As a woodworker, you can probably rattle off the names and uses of half a dozen kinds of saws without blinking.
But take a step back for a moment. Suppose you needed to cut a piece of wood, but you didn’t have a saw. You might wonder how to cut wood without a saw.
Go out and buy one. Okay, but let’s aim for a little more creativity. You are snowbound in your woodshop and can’t get out to buy a saw or repurpose another tool.
A saw is not the only piece of equipment that can cut wood. Depending on your purpose, it may not even be the best one.
Let’s look at a number of other tools that can do the job with a little ingenuity and skilled usage.
How To Cut Wood Without A Saw Using Different Wood Cutting Tools
1. Using A Sharp Knife

Probably obvious, since you use one almost every day to cut other things. But a knife is not a 1:1 substitute for a saw and it requires a little finagling to work well.
First of all, make sure it is sharp. Trying to cut wood with a dull blade has got to be one of the most frustrating, pointless actions a woodworker can take.
Grab your file and devote some time to sharpening the blade. You will make it up in cutting time.
A knife works best for thin pieces of wood. Grasp the wood firmly or use a vice, then cut with a slanted angle. A knife won’t work as well if used straight on the wood.
Slide the knife back and forth with even pressure and tempo. Because it doesn’t have a full handle like a saw, you want to be careful not to slip and cut your palm.
Another way to use the knife is to essentially score the wood with the tip. By using the point to dig out tiny bits of wood, you can create a small trough.
Then carefully snap the wood in two and use the knife to smooth the rough edges. Voila…mission accomplished!
2. Using A Machete

Think knife on a grand scale, and a lot of the same rules apply. Get that file and sharpen the machete to an almost razor edge if you can.
A machete is a good non-saw option for grappling with raw wood straight off the tree, or for a larger round piece of wood.
Mark the area where you want to make the cut. If it is round piece, mark the entire circumference. Make sure the wood is held firmly by you, another person, or a vice. You don’t want the wood (and hence the machete) sliding where you don’t expect it.
A machete can be used with the same angle cut as a knife, or it can cut more roughly with a hacking motion. If hacking, rotate the wood and make cuts along the line you drew earlier. Keep turning the wood so it gets cut evenly.
When the groove is deep enough, you can either switch to the angled cut, or treat it like a deep score mark and snap the wood in two. As with the knife, you can use the machete to smooth any rough edges.
3. Using An Axe

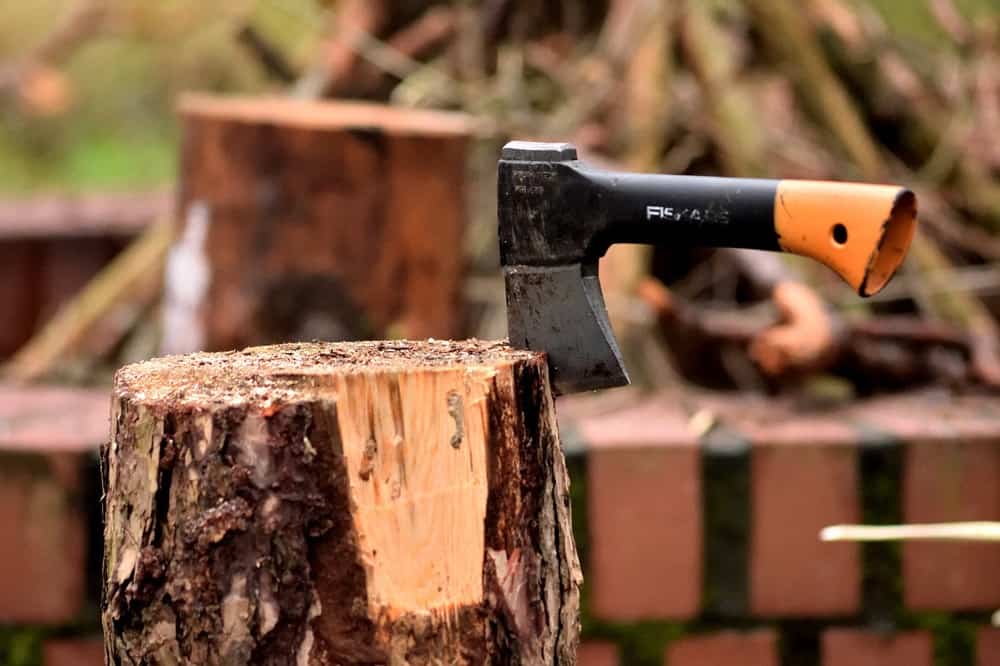
An axe is actually one of the oldest, most long lasting cutting tools for a very good reason. It works well.
As usual, grab your file and sharpen. Axes are best for bigger pieces of wood (think log size). They are great for chunking wood into more manageable sizes.
Make sure the wood you mean to cut is on a firm foundation, ideally something like a tree stump. It should also be about waist high. When you swing the axe you don’t want to have to bend at the waist to reach the wood.
Hitting your mark may take some practice. It can be a long ride between the start of your swing and contact with the wood, and slight variations in your movement can translate into big differences in where the axe hits.
Try to make a large V-notch in the wood with your first few strikes. This will make it easier to aim and give a large landing area for the blade.
About halfway through the depth, flip the wood over and start cutting on the other side. When there is only a small strip of wood left to cut through, you can either use the axe or snap the pieces apart, like you would with scoring a smaller piece of wood.
4. Using A Hatchet

An axe’s little cousin, the hatchet is good for chopping smaller pieces of wood (think kindling size). With its smaller blade and shaft, it is intended to be used one-handed.
Besides kindling, hatches can create smaller tinder shavings, or stretch to cut down small trees. Though not as efficient as an axe for the trees, it still can hold its own when it needs to.
It uses the same raised-arm lever approach as an axe, so the same precautions are necessary. Make sure the wood is firmly set at a comfortable height.
Practice a few swings to get used to the feeling of the hatchet. And as always, make sure it is as sharp as you can get it.
5. Using Chisel And Hammer

Another ages-old woodcutting technique that has stood the test of time is the chisel and hammer combination.
This won’t give you a precise cut, but it will split the wood along the grain and prevent you from taking a bigger chunk out of the wood then you mean to.
Sharpen the edge of the chisel as much as possible. Make sure the wood is secure on a firm surface and hold the chisel at about a 20 degree angle. Place the beveled side is up and the flat side is pressed against the wood.
With a firm swing, hit the end of the chisel with the hammer. It is kind of like hitting a large nail. Repeat as often as needed to split the wood. It is better to make several smaller hits than one massive strike.
You may be able to use the chisel to smooth some of the rough edges after it is cut as well.
As with the axe and hatchet, you may want to practice a few times before you actually try to cut the wood. Exercise caution so you don’t accidentally hit your hand when you are swinging the hammer.
6. Using A Router

In our scenario, we said you didn’t have a saw and you were snowbound. But you still have electricity.
A router is a go-to tool for a number of woodworking tasks, and cutting is certainly one of them.
A CNC router would be the most ideal choice, but those can be a little expensive. Whatever router you choose, make sure you have quality bit.
To begin, attach your router bit and make sure the gauge is correct for the depth of the cut. Pull up the router trigger to set the router into the wood, and then push the trigger down.
Move the router carefully in the direction of the cut. When the cut is finished, release the handle pressure.
You may need to make several passes to get the depth you need. Cutting too deeply at once may bog the router down or break the bit.
Don’t surprise when the router creates more wood chips than a jigsaw would for doing the same job, however.
Since routers have a variety of bits, you may choose another to smooth out the edges of your piece. Always remember to set your gauge before you begin.
7. Using A Lathe

Another furniture builder favorite, a lathe can cut and shape wood, allowing intricate patterns for an attractive finished piece.
For safety, you want to make sure you have prepared the wood and that it won’t come off the lathe as you pare it down.
If you are beginning with a rough piece of wood, be sure to remove rocks, dirt, small bumps, and anything that could easily go flying when the wood is being cut.
Lay the piece down and attach the faceplate firmly. Don’t place the screws along the grain or you risk splitting the wood. Find and mark the center of the piece of wood and place in between the lathe centers.
Begin with the lathe at its slowest speed and select the chisel that will best accomplish the indentation you need.
Place the chisel on the tool rest and slowly ease it towards the turning wood. Using several passes, push the tool more deeply into the wood.
Only increase speed when you are toward the final stages of your carving, and then just lightly touch the wood.
8. Using A Plane

A plane will cut your wood with long strokes that shave thin strips off. If you are using a hand plane, it is especially important to make sure the edge is sharp as a razor.
Sharpen to about a 25 degree angle for most wood. Occasionally soft woods may require a 20-23 degree angle.
Adjust the depth wheel to fit your piece of wood and carefully plane the wood for its entire length. Be sure to follow the direction of the grain or you might ruin the wood.
If you feel bumpiness as you are pushing the plane and your surface looks rather ripped up, it is an easy problem to fix.
Try lightening up on the cut, sharpening your blade again, skew the plane at a steeper angle, or simply put more pressure on the knob as you lean into the cut.
9. Using A Drill

One surprise contender for cutting wood is the common drill. This is another technique which ‘scores’ the wood until you can break it. Make a line where you want to cut the wood.
Drill holes as close together as possible along the line. Remember, the larger the drill bit, the bumpier your cut edge will be.
Keep in mind that different auger bits have different results. Screw points leave exit holes that are pretty rough, whereas hollow centers chew through tough materials like green wood and steel nails.
Spade bits cut fast but leave even rough exit holes than screw point bits. The cleanest holes will be left by brad point twist bits.
When you have made holes across the cut marking, snap the pieces apart. You may need a chisel or knife to smooth the edges.
Conclusion
As a woodworker, you probably love to exercise creative control over your pieces. Finding alternatives to the traditional saw can both get you out of a pinch when you don’t have one, but also give you new challenges and techniques to try.
Did you find any of these suggestions helpful? Have you used any other tools as an alternative for a saw? Share your thoughts and ideas in the comments below!


![9 Best Pole Saws of 2023 [Ultimate Guide] 9 Best Pole Saws of 2023 [Ultimate Guide]](https://handykeen.b-cdn.net/wp-content/uploads/2021/03/best-pole-saw-300x200.jpg)


![How To Start A Woodworking Business [Ultimate Guide] How To Start A Woodworking Business [Ultimate Guide]](https://handykeen.b-cdn.net/wp-content/uploads/2021/10/woodworking-business-1-300x200.jpg)