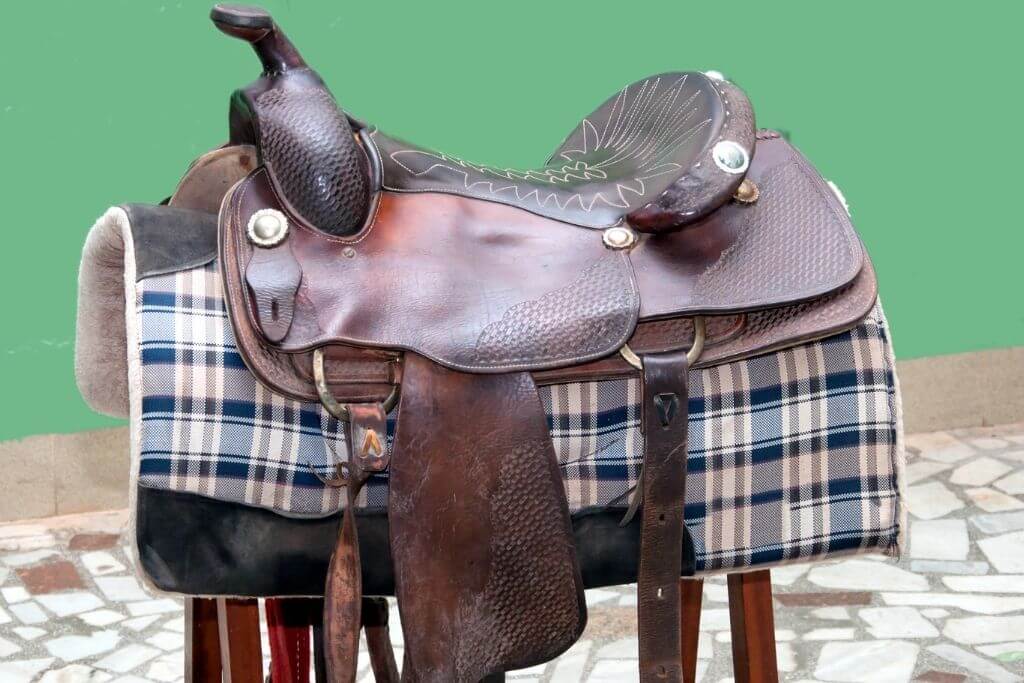
A horse rider must give their horse saddle proper attention and care. With these DIY saddle rack plans, you will learn to build a useful rack to keep your saddles from the floor.
We all know how easy saddles get misshapen and dirty from laying on the floor. Misshapen is especially dangerous, as it causes damage to not only the saddle but also the horse.
These plans all have varying degrees from easy to difficult. That means both pros and newbies can find a suitable plan on the level.
But almost they are easy to build. Check it now!
Table of Contents
- 1. DIY Easy Wood Saddle Rack
- 2. Free Saddle Stand Plans From How To Specialist
- 3. DIY Saddle Stand By Lisa Goodwin
- 4. DIY Wood Saddle Rack Plan
- 5. DIY PVC Saddle Stand
- 6. DIY Collapsible Saddle Rack
- 7. Build A Saddle Rack From Crazy Chick DIY
- 8. Easy Collapsible Wood Saddle Rack
- 9. DIY Saddle Stand Plan From My Outdoor Plans
- 10. Mini Wall Mounted Saddle Rack
- 11. Hauling Horse Saddle Stand
- 12. DIY A Saddle Stand By Home Built Workshop
- Conclusion
1. DIY Easy Wood Saddle Rack
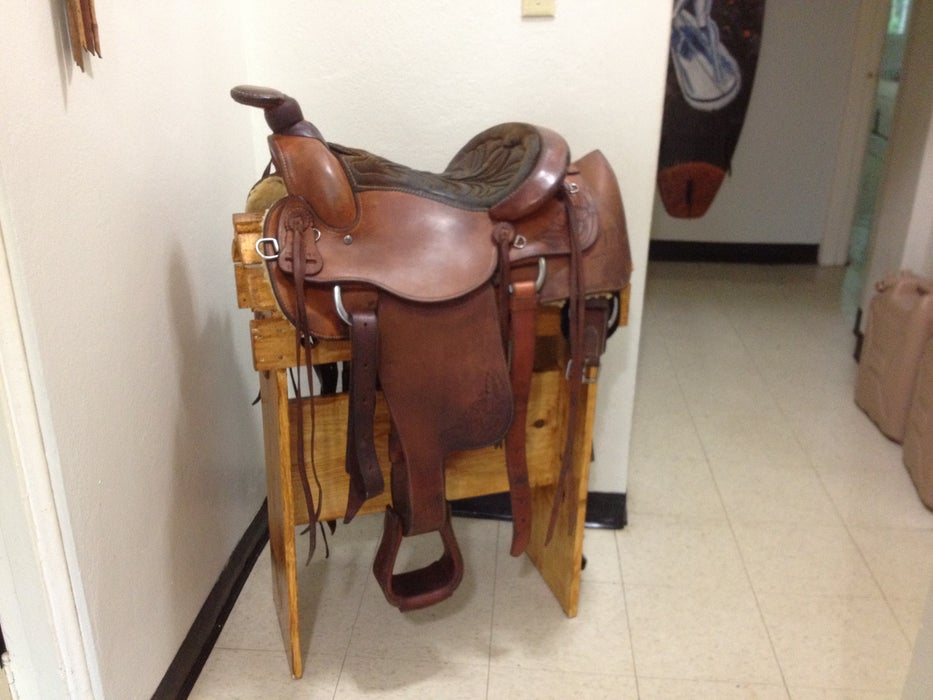
The idea behind this saddle rack is to use up as little money as possible. That is why it only involves one 12×8 and three 3×8 boards, all 1 inch in thickness.
It also allows you 2 choices on the design, a normal one and an improved one with an additional shelf. If you want to do the improved version, change the 12×8 into 12×10.
This shelf will do wonders in storing brushes for your horses. It also adds in some support for the center of the rack. As a result, the rack will become much more durable and long-lasting.
Project details: instructables.com
2. Free Saddle Stand Plans From How To Specialist
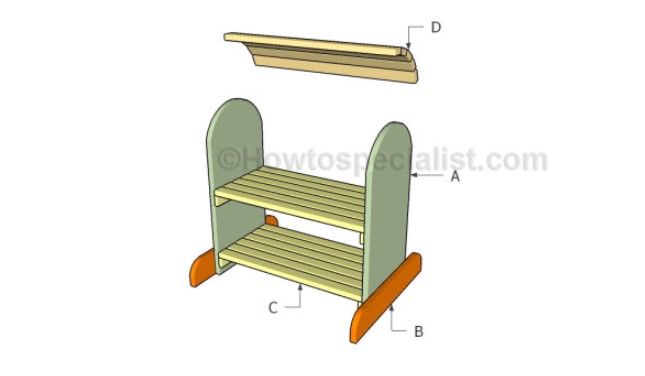
The core of this project lies in the sides, which are much more stable than those of normal saddle stands. To attain this advantage, you don’t just stop at building the base but attach a supporting piece to it.
This piece ensures more contact between the stand and the ground. As a result, this saddle rack can take a lot of weight without suffering from any wobbling.
Moreover, the storage compartment is divided into 2 shelves. This choice makes it easier for you to categorize your storage.
Project details: howtospecialist.com
3. DIY Saddle Stand By Lisa Goodwin
This stand features a curved top, which is especially useful in keeping the saddle firmly in place.
Making up the dome are 7 one-inch-thick slats. All of them are well sanded, so they will not damage your saddle.
The base is built into a rectangle shape, which can take more weight.
The plan requires you to add a top plank on the base frame to improve its strength. This plank will keep the base from tearing and wobbling under pressure.
There is also a J hook attached to each side of the sidewall. This hook lets you have an easier time moving your equipment.
To give it a shiny look, you will need a primer and Rust-Oleum oil-based paint.
4. DIY Wood Saddle Rack Plan
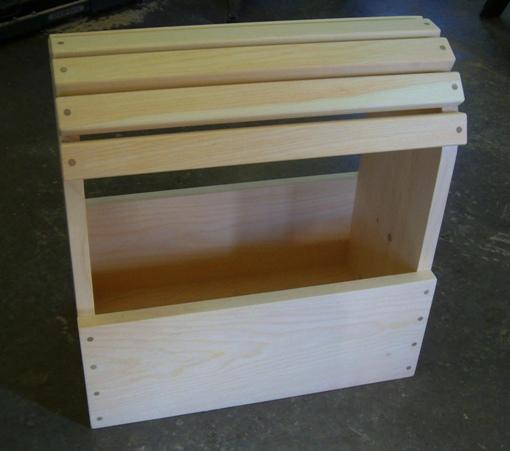
Some of us are not as experienced in woodworking, and this plan is suitable for beginners.
There is nothing fancy about it. It is just a basic 24-inch high and 24-inch wide saddle stand but effective to keep your saddle clean.
However, the special thing is how detailed it is. Every step has specific dimensions and steps listed from this guide, with accompanying pictures. You should have the right materials and tools. It’s easy to follow.
Of course, you can customize any size of this plan to be suitable for storing your saddle.
Project details: woodworkingcorner.com
5. DIY PVC Saddle Stand
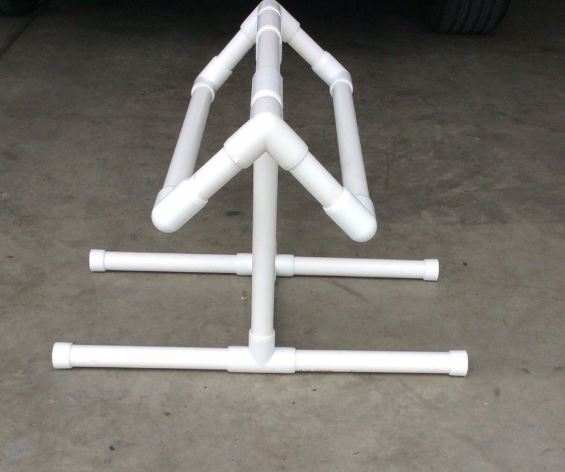
Most above DIY saddle stand ideas involve dealing with wood. This plan is not the case, as it tackles a highly durable, flexible, PVC. It’s quite cheap and simple to build.
Having said that, this plan is special because you won’t need to deal with the actual hard stuff like reshaping/cutting the PVC. It already provides you with the required lengths.
So, you just have to get some long PVC pipes and ask an expert to cut them for you. They usually charge pennies for this type of job. Or you can cut them by investing in a tube cutter.
The core, however, lies with the T-shape fittings and the 3-way elbows, which you should buy from Home Depot or local store.
After you have all the materials, simply fix them together according to the plan’s diagram.
Project details: budgetequestrian.com
6. DIY Collapsible Saddle Rack
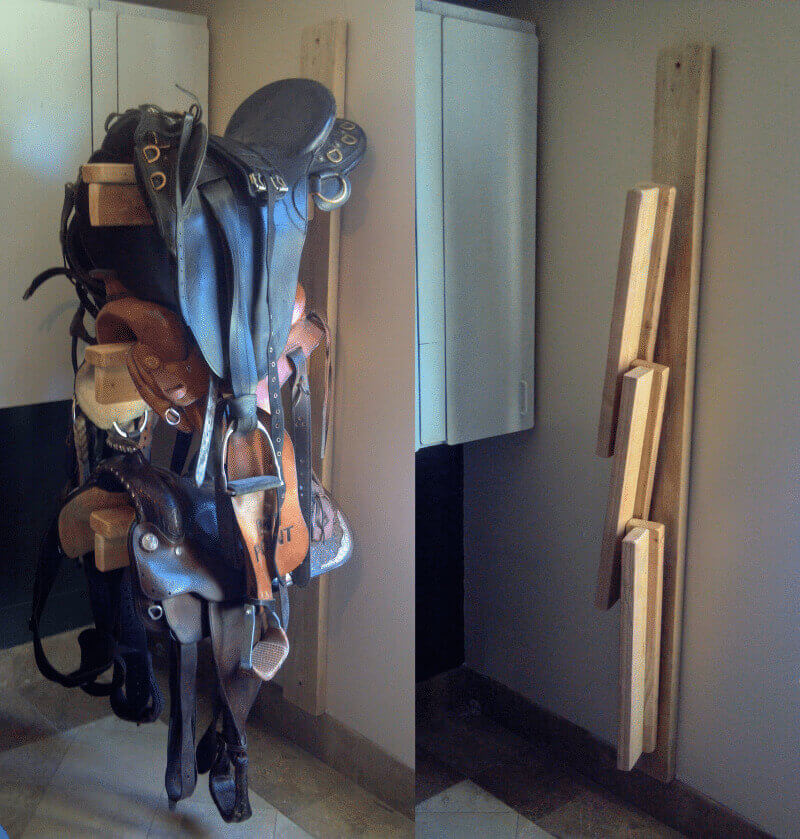
Some of the saddle racks cannot fit 2 or more saddles, as they are much heavier than they look.
If you want to fit more saddles, the rack tends to take up a lot more space. This plan takes care of this issue by incorporating a collapsible design.
Some of you must feel skeptical about its strength after seeing the word collapsible. The truth is the opposite, though, thanks to multiple J-hooks and eyebolts.
Unless you apply forces in a specific way, this combo will offer the same strength as screws. However, they can move, letting the stand collapse into itself.
Project details: teediddlydee.com
7. Build A Saddle Rack From Crazy Chick DIY
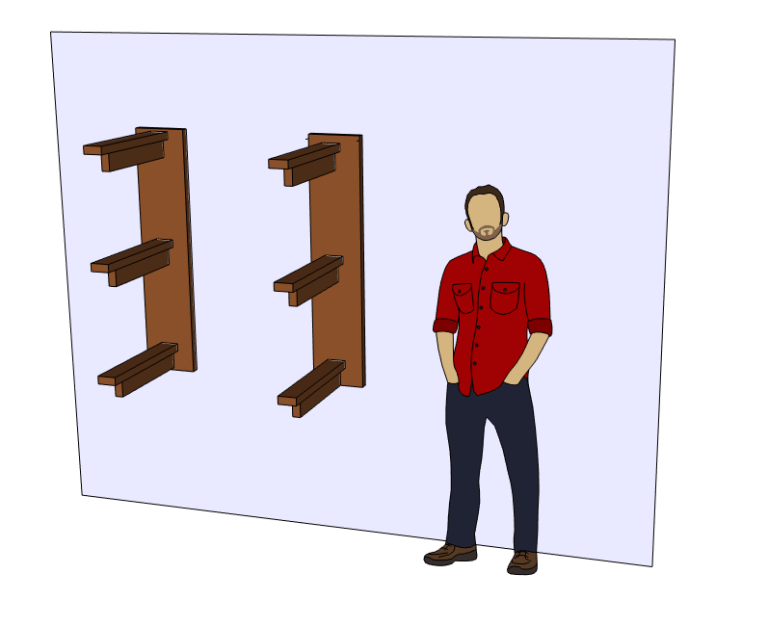
The first thing you will notice about this project is how customizable it is. It even provides you with an equation to calculate the number of boards necessary depending on your saddle rack number!
It is also a rare case where you don’t need to worry about your room’s available area. After all, it is mounted into your wall.
Of course, saddles are very heavy, so you need something to help with load distribution. You can take care of this issue with wall mounting a stud by 3” screws or longer screws depending on the thickness of walls.
Project details: crazychickdiy.com
8. Easy Collapsible Wood Saddle Rack
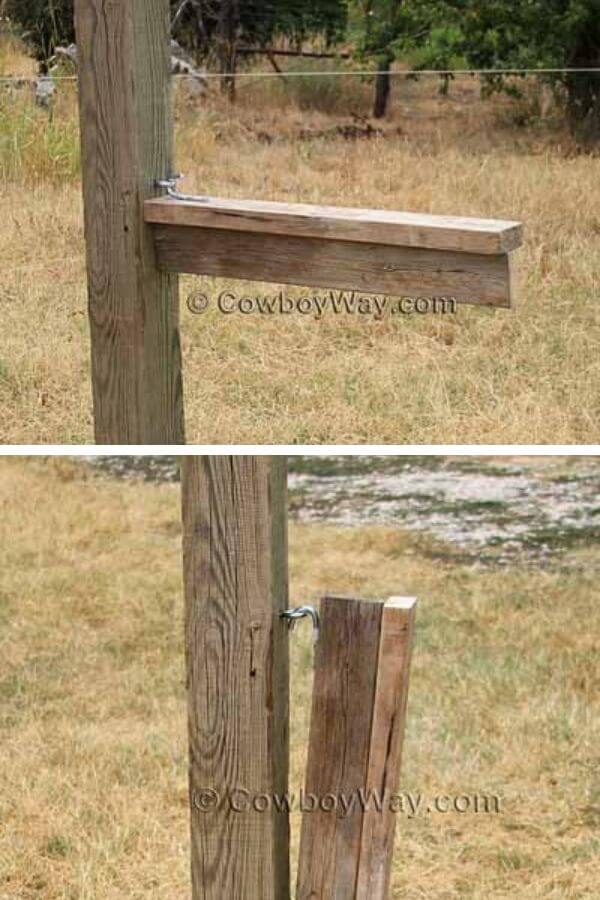
While we say it’s a saddle rack plan, you only need to build a T-shape construction out of two 2×4 boards. That’s all on the wood-crafting side. It doesn’t get any easier than that.
Of course, this doesn’t mean there is nothing else to do.
The best thing about this project is that it uses already existing construction to serve as its mount. Anything strong and stable can do, from walls to post, etc.
After deciding on the mounting piece, simply put an eye bolt into it, then fix a J-hook into your T wood piece and connect them together. You are done!
You can collapse it by turning it around and hanging it another way when not using it.
Project details: cowboyway.com
9. DIY Saddle Stand Plan From My Outdoor Plans
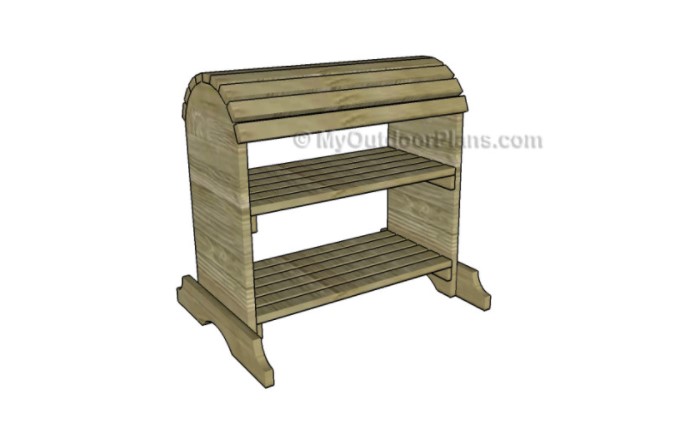
The only description that we can give to this DIY saddle rack is “professional”. Instead of making a straight base, it requires you to make round notches on the bottom of the sides.
Of course, doing so means its balance will suffer, so the plan adds in 2 supporting pieces. It doesn’t stop there, though, as the supports are also cut with curved notches in a decorative manner.
This gives the whole saddle stand that extra exciting and beautiful as a decorative piece for your home.
Project details: myoutdoorplans.com
10. Mini Wall Mounted Saddle Rack
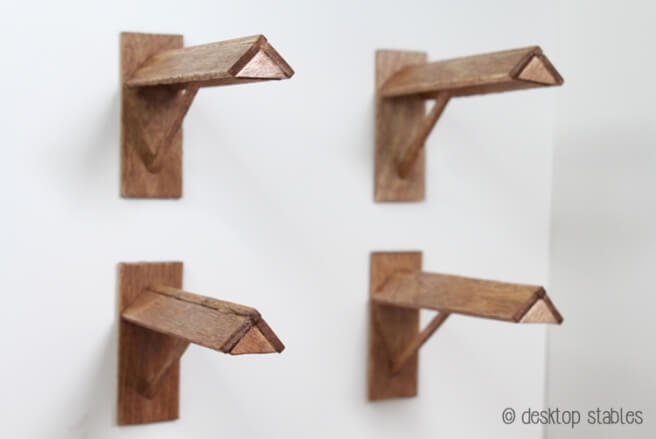
First of all, it’s important that you know this plan does not make a functional saddle rack but a mini, decorative one. It is, after all, a part of a large project called miniature tack room.
As it’s not a functional plan, it is unnecessary to be strong like other racks. That is why there are only 3 parts to this rack. They consist of a stud, a triangle component built out of 2 popsicle sticks, and a craft matchstick acting as support.
Everything is held together by glue, so don’t put anything heavy onto it. If you want to make a normal size rack like this, scale up the project. Some screws and joints are necessary for durability too.
Project details: desktopstables.com
11. Hauling Horse Saddle Stand
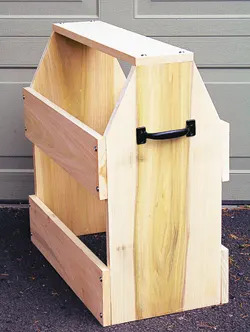
Most saddle racks are either too bulky to move around or stuck to walls, posts, etc.
This DIY saddle rack is different, as its result is a stand specifically designed for hauling around with pickups/sport utilities.
To obtain this result, the plan gets rid of all unnecessary features like a round top or fancy shelves.
It also requires you to pick your material wisely, as denser wood increases the weight. The plan recommends the lightweight but strong poplar.
The top will be in a trapezoidal shape, not the usual round one. This choice ensures that the saddle can still stay in place, yet the weight doesn’t increase.
Project details: equisearch.com
12. DIY A Saddle Stand By Home Built Workshop
Sometimes, there is no other requirement for a saddle stand than being as strong as possible. That’s exactly what this project is all about.
The sidewalls are not built from 1 single piece but multiple planks connecting through biscuit joints. These joints will disappear once you connect them, and they are very strong.
The top follows a more simplistic design with only 2 planks creating a triangle. This design asks for much fewer screws than the usual round design, which features many more planks.
There should be a gap between the 2 planks to ensure that no pointy tip can damage the saddle.
In the same vein, you cover the screw holes connecting the legs with the base and the top to the frame with empty shell casings.
They will turn into caps for your screws, and once they are on, they snugly fit and never pop off with no need for glue.
The final design choice is adding in the conchos, which usually can only be a leather project accessory.
This project smartly utilizes an adapter to turn it into a wood screw thread from a Chicago screw thread. The result is a stylish accessory that also serves as a screw cap.
Conclusion
With these DIY saddle rack plans, they all let you build fully functional racks and even a decorative one at a fraction of the cost of buying one.
Each guide has its own unique characteristics. For instance, the PVC one is almost entirely Lego-fitting with cheap cost. The hauling horse saddle rack can fit in most pickup models without adding too much weight.
We hope you will pick a plan suitable for your needs from this list.
Let’s start building today!
![9 Best Pole Saws of 2023 [Ultimate Guide]](https://handykeen.b-cdn.net/wp-content/uploads/2021/03/best-pole-saw-300x200.jpg "9 Best Pole Saws of 2023 [Ultimate Guide]")
![How To Start A Woodworking Business [Ultimate Guide]](https://handykeen.b-cdn.net/wp-content/uploads/2021/10/woodworking-business-1-300x200.jpg "How To Start A Woodworking Business [Ultimate Guide]")