Although Halloween is typically associated with pumpkins and witches, there are endless possibilities when it comes to decorations.
If you’re looking for a unique and affordable way to spruce up your home this Halloween, consider using pallets.
Pallets are easy to work with, and you can create a variety of spooky and fun decorations. Check out these 25 pallet Halloween decorations ideas for some inspiration.
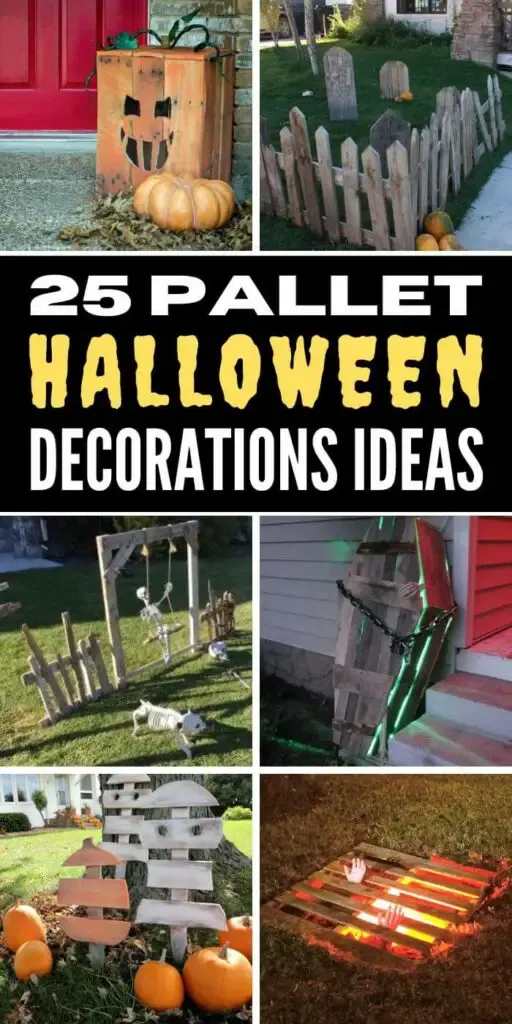
Table of Contents
- 1. DIY Pallet Halloween Coffin Decoration
- 2. DIY Spooky Pallet Graveyard
- 3. Halloween Zombie Pit DIY
- 4. Wood Block Halloween Family
- 5. Countdown To Halloween Pallet Sign
- 6. DIY Pallet Halloween Zombie Pit With Lights, Sound, And Fog
- 7. Easy Halloween Pallet For Halloween Decoration
- 8. DIY Pallet Wood Jack O’ Lantern
- 9. DIY Simple Pallet Tombstones For Halloween Decoration
- 10. DIY Halloween Directional Pallet Sign
- 11. Halloween Pallet Project From Real Advice Gal
- 12. DIY Pallet Pumpkin Trio
- 13. DIY Pallet Halloween Neon Sign
- 14. How To Make A Wood Pallet Halloween Fence
- 15. How To Make a Halloween Yard Dungeon
- 16. Make Wooden Halloween Ghosts For outdoors
- 17. Turn Wood Pallet Into A Halloween Jack-O’-Lantern
- 18. Halloween Wood Pallet Fence
- 19. DIY Halloween Pallet Sign: Keep Out!
- 20. Make a Skull Head For Halloween Decoration
- 21. Halloween Pallet Style Signs
- 22. DIY Halloween Pallet Pumpkins
- 23. DIY Halloween Pallet Project: Zombie Pit
- 24. Pallet Ghosts For Font Yard Décor
- 25. Cheap DIY Halloween Pallet Sign
1. DIY Pallet Halloween Coffin Decoration
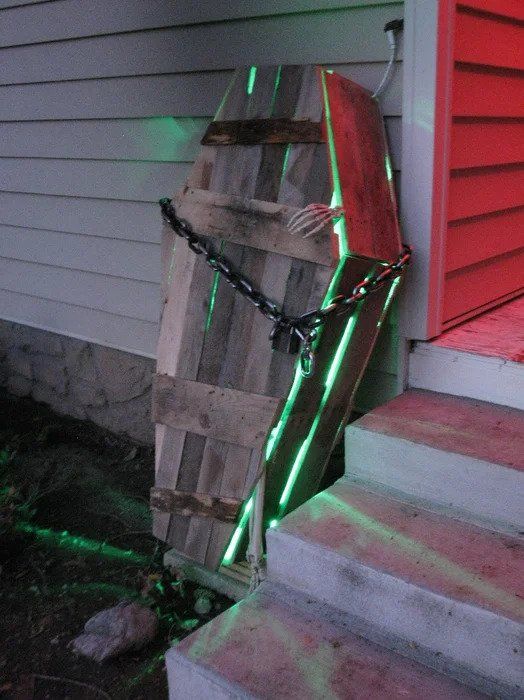
Building a coffin from pallets is a great way to add some exciting Halloween decor to your home.
The project is quite easy to do and only requires a few basic tools. You will need a circular saw, crowbar, screws, and nails.
First, collect the wood you will need from some old pallets. You can easily harvest the wood by cutting it down with a circular saw and
then prying or twisting the slats loose.
Next, use the slats to build the front and back panels of the coffin. Arrange the slats so that they are offset from each other, and then screw them into place.
This will give the panels added strength. Then, cut out the side panels and secure them with blocks of wood.
Finally, add some finishing touches, like hinges, skeleton and a chain prop, to really make your coffin stand out.
For an extra touch of creepiness, you should add a green rope light to the inside back panel.
Project details: instructables.com
2. DIY Spooky Pallet Graveyard
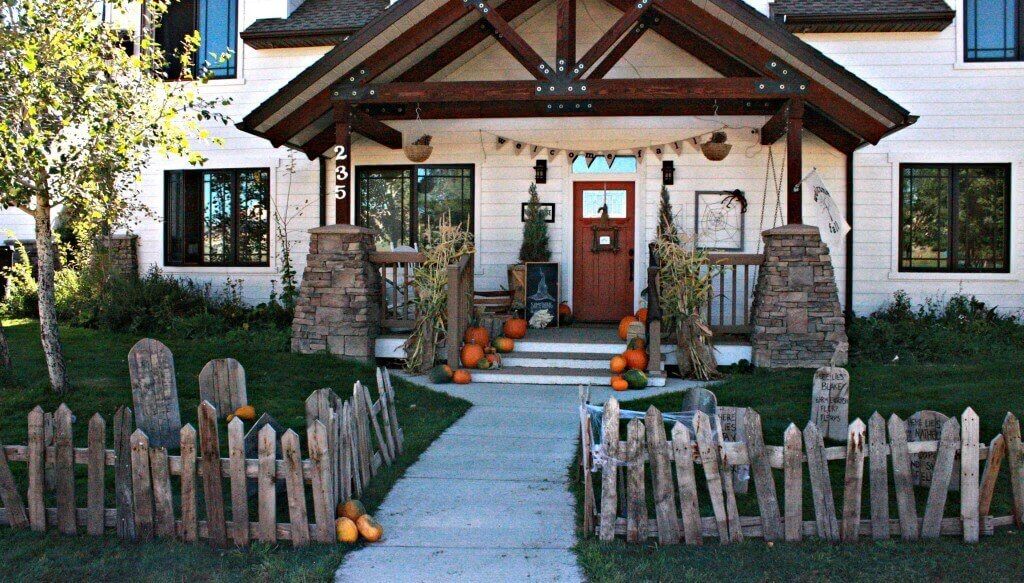
Creating a spooky graveyard for your yard doesn’t have to be difficult – in fact, using pallets can make the process a lot easier. This graveyard is a great way to add a focal point to your entryway.
Start by tearing apart the pallets and then cutting out headstone shapes. You can use a reciprocating saw to make the job easier.
Next, create a fence around the headstones using pallet slats cut to look like pickets.
Finally, screw the sections together to create the fence and graveyard. Add some personal touches to the headstones to make them your own.
Project details: twelveonmain.com
3. Halloween Zombie Pit DIY
This Halloween, create a zombie pit for your backyard using a pallet and some cinder blocks.
Spray paint the cinder blocks to make them look old and weathered, and add muddy water to make them look more realistic.
Zip-tie severed arms to the cinder blocks, and add plastic chains for extra creepiness. Finally, add a creepy mask to complete the look.
This zombie pit is sure to be a hit with your Halloween guests.
4. Wood Block Halloween Family

The wood block Halloween family is a fun, easy, and inexpensive DIY project for the whole family. The project begins with a 2 x 6 wood board that is cut to size and then sanded, distressed, and painted.
The board is then decorated with felt, google eyes, and a black Sharpie marker to create the Halloween characters. The project is completed by adding faux chains to the family.
The end result is a fun and spooky decoration that will make the kids smile.
Project details: ribbonsandglue.com
5. Countdown To Halloween Pallet Sign
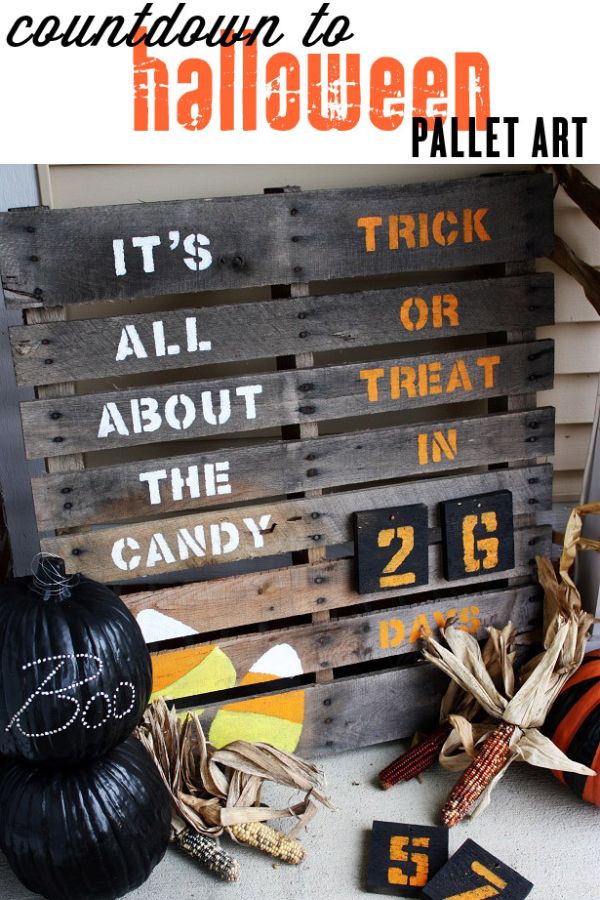
This fun and easy project are perfect for involving the kids to help! they will love seeing the countdown to Halloween while also getting into the spooky spirit.
All you need is a pallet, some paint, stencils, and nails. You can choose to hand-paint or spray paint the sign
Also, you can add some candy corn or other decoration around the sign for an extra touch.
Project details: thecelebrationshoppe.com
6. DIY Pallet Halloween Zombie Pit With Lights, Sound, And Fog
This is an amazing project not only spooky up the night but also has some awesome special effects. It’s really quite impressive when all put together with lights, fog, and sounds!
7. Easy Halloween Pallet For Halloween Decoration
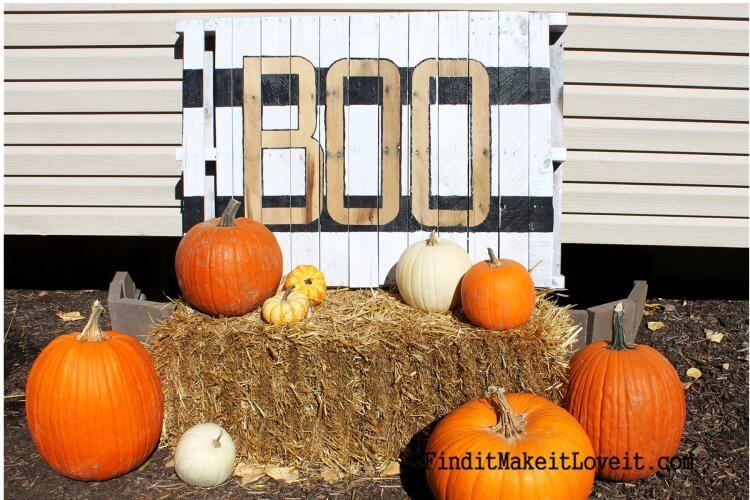
This easy Halloween pallet decoration will add some fun and excitement to your home for the holiday.
All you need is a pallet, some tape, white paint, and a box cutter. You start by taping off the word “BOO” on a pallet. Then, use a box cutter to round off the corners and paint the whole thing white.
Once the paint is dry, tape off stripes and paint them black. Finally, outline the letters with a small paint brush. Add a bail of straw and some pumpkins to complete the decoration.
Project details: finditmakeitloveit.com
8. DIY Pallet Wood Jack O’ Lantern
This easy DIY pallet wood lantern project can complete in a few hours using minimal tools.
The finished product is a beautiful, rustic-looking lantern that can be used as a decoration or light source.
Plus, it’s inexpensive! You can find LED candles at most dollar stores or craft stores.
9. DIY Simple Pallet Tombstones For Halloween Decoration
DIY tombstones are a simple and easy way to add some Halloween decorations to your yard.
All you need is a few boards, some nails, and some vinegar and steel wool. You can use any type of wood for the tombstones, but make sure to rough them up a bit so they look old and weathered.
Once they are ready, write the names of your favorite dead celebrities on them. Stick them and enjoy!
10. DIY Halloween Directional Pallet Sign
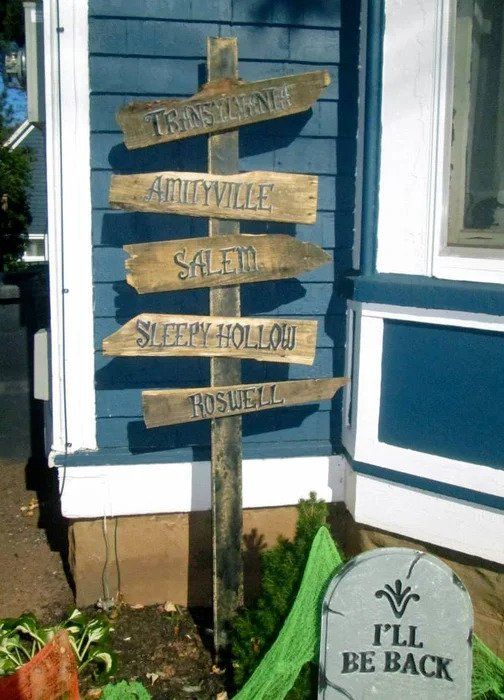
This simple Halloween directional sign is a great project for beginners. There are not too many tools or materials needed, and it’s a cheap way to add some Halloween decor to your front yard.
Project details: instructables.com
11. Halloween Pallet Project From Real Advice Gal
Project details: realadvicegal.com
12. DIY Pallet Pumpkin Trio
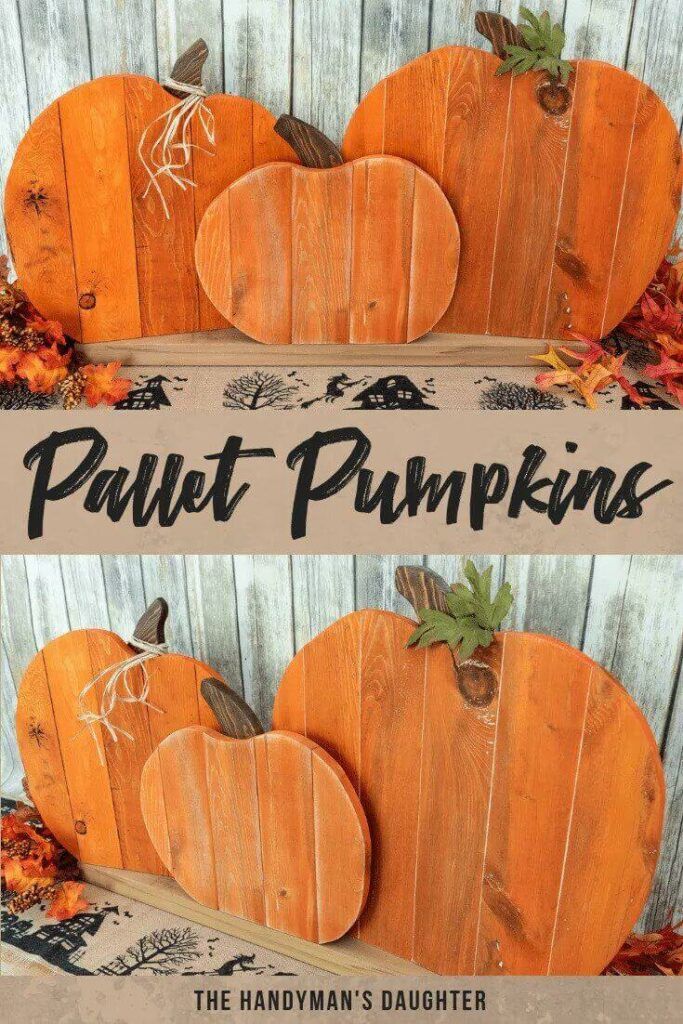
Creating a pumpkin centerpiece out of a pallet is a simple and rustic project.
First, you cut out the shapes of the pumpkins from the pallet using a jigsaw. Then, attach the stems using brad nails or screws.
Stain and distress the pumpkins to give them a weathered look, and attach them to a base using angle brackets.
Lastly, add some faux leaves and finishing touches for a festive effect. You can add some spooky faces to add scary to each pumpkin.
Project details: thehandymansdaughter.com
13. DIY Pallet Halloween Neon Sign
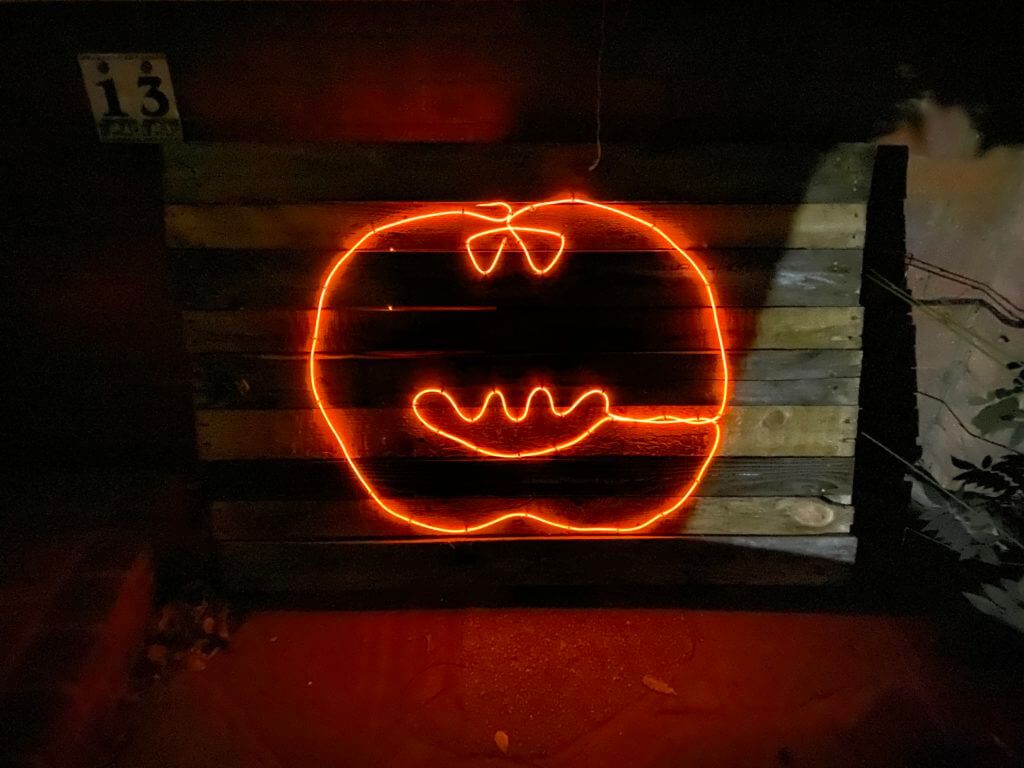
The sign is decorated with a glowing pumpkin that you can easily design. It can place outside to welcome trick or treaters. With the EL wire, it will also provide a spooky glow in the dark.
Project details: the-gingerbread-house.co.uk
14. How To Make A Wood Pallet Halloween Fence
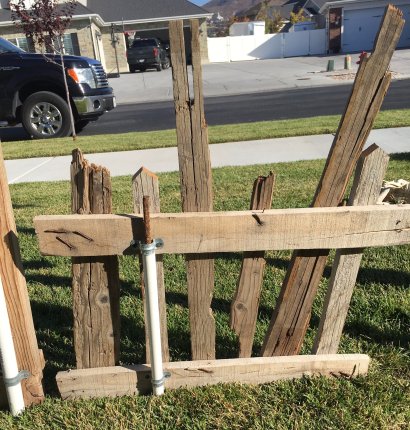
Let’s add some spooky fun to your yard with this pallet fence.
This project will show you how to make a Halloween pallet fence that is 4 feet long, 6 pieces at 2-2 1/2 feet long, and makes from PVC pipe, conduit straps, rebar, and black screws.
Project details: citygirlmeetsfarmboy.com
15. How To Make a Halloween Yard Dungeon

Project details: mommyperfect.com
16. Make Wooden Halloween Ghosts For outdoors
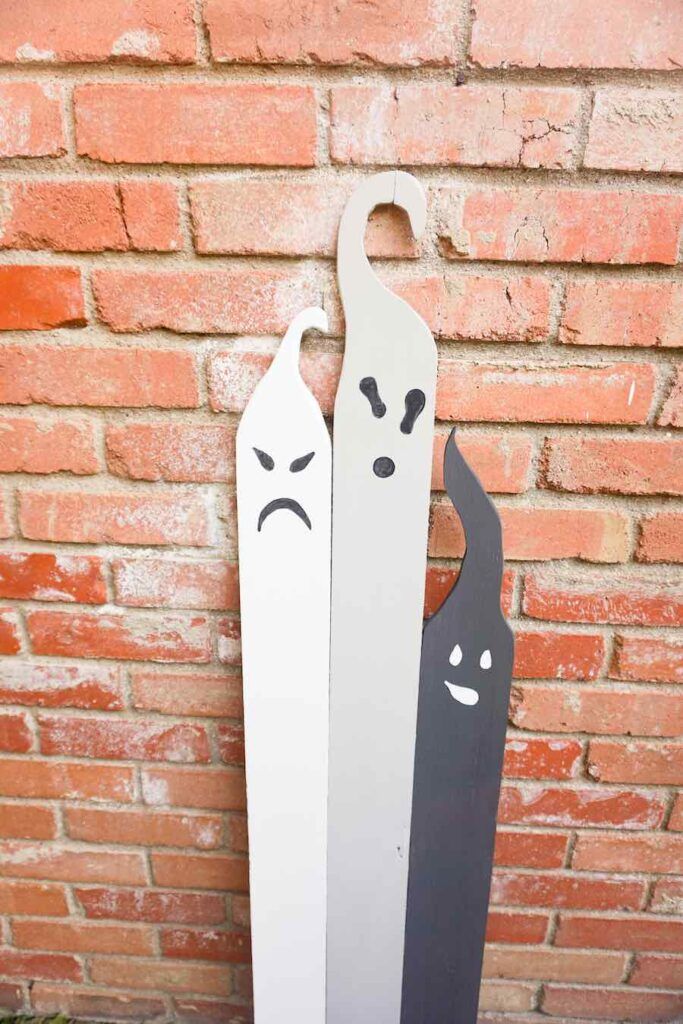
If you’re looking for a fun and easy Halloween craft project, you can’t go wrong with these adorable painted wooden Halloween ghosts.
They make a great addition to your Halloween decor.The best part is that you can easily customize to how your desires as colors and each ghost can be unique.
Project details: happiestcamper.com
17. Turn Wood Pallet Into A Halloween Jack-O’-Lantern
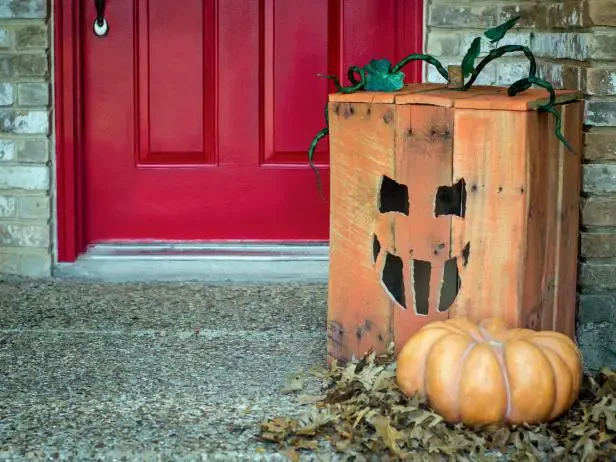
You can spook up your front porch, walkway or any dark corner with this Halloween pumpkin.
The guide describes how to make easy a pumpkin decoration from pallet boards.
You will need a 15″ x 15″ piece of MDF board, some pallet boards, 3/4″ nails, and wood glue.
First, you will assemble the pallet boards into a box shape, then attach the MDF board to the bottom.
Next, you will cut out a face design in the front of the box. Finally, add wire vine wrapped in tissue paper and screw on a stem. Place a light inside to finish.
Project details: hgtv.com
18. Halloween Wood Pallet Fence
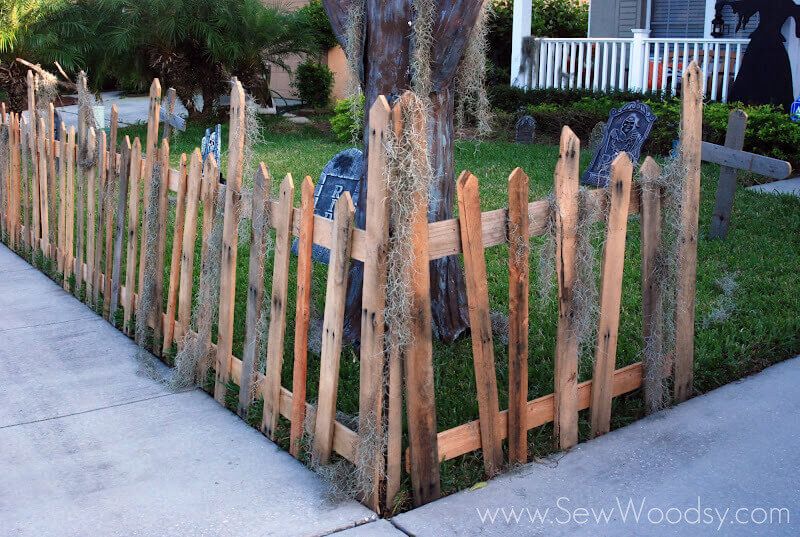
This wood pallet fence is an effective way to add some extra rustic feel to your home as well as add some Halloween flair to your yard.
When all the fence sections are assembled, you should decorate with moss around and tombstones or skull inside for an extra spooky look.
The finished product is a Halloween-themed fence that is sure to impress friends and neighbors.
Project details: sewwoodsy.com
19. DIY Halloween Pallet Sign: Keep Out!
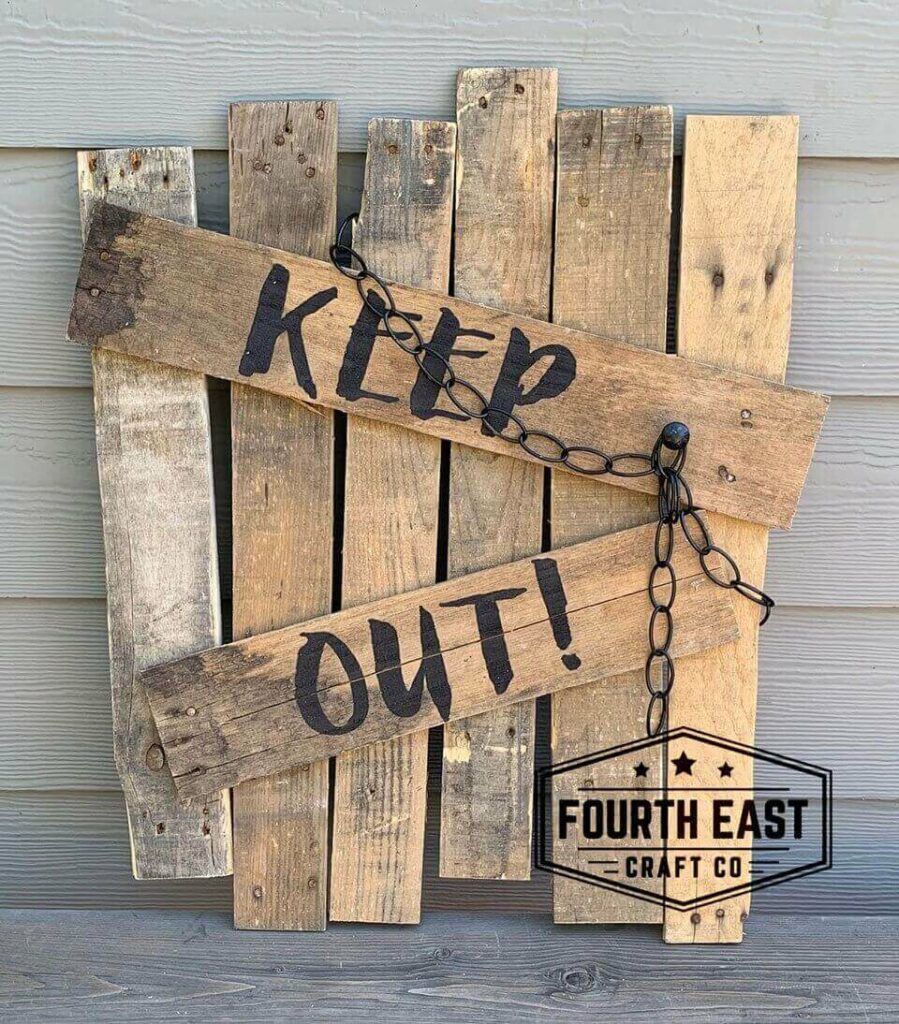
The pallet sign was a simple project that turned out well. It’s perfect for giving the effect like a haunted house.
To make a this pallet sign, you will need: a pallet, stencil, carbon transfer paper, sharpie marker pen, paint, chains, and bolts.
First, print the stencil and trace it onto the pallet using carbon transfer paper. Then, you paint the letters on the pallet and embellish with chains and bolts. Finally, display the pallet sign in your home or yard.
Project details: fourtheastcraftco.com
20. Make a Skull Head For Halloween Decoration
The skull heads is a great decoration if you’re looking for something spooky for your home. It can be hung up on the side of the house or anywhere. It’s easy to make with a few simple tools.
First, mark out where you want to cut using a magic marker. Drill out the teeth using a smaller drill bit, then cut out the eyes and other features using a jigsaw.
You can use a scroll saw blade for this part if you have one. Glue the boards together and staple them in place, then outline and cut out the nose and mouth. Paint it white if you want, and hang it up with some hooks.
21. Halloween Pallet Style Signs
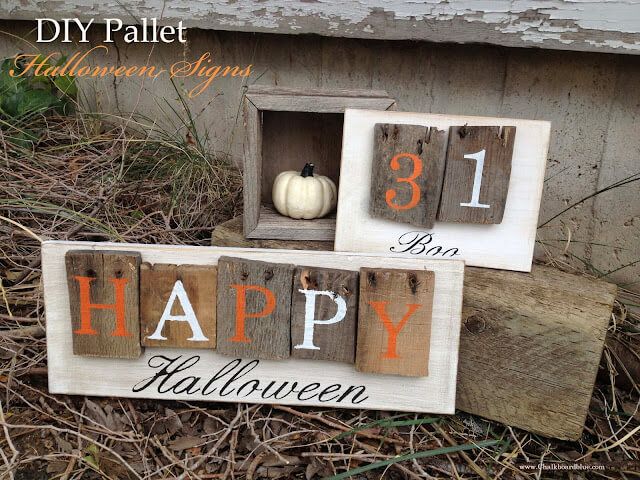
Discover a creative way to celebrate Halloween by repurposing weathered pallet wood into charming, rustic signs.
The author took chunks of an old, beaten-up pallet to add a rustic, 3-D effect to Halloween-themed boards.
To create the signs, two pine boards were cut to specific dimensions—one for a “Happy Halloween” message and the other for the date “31.”
After painting the pine boards white and adding a touch of stain for the character, stencils for the words were cut using a Silhouette Cameo.
The pallet wood chunks were then strategically cut and glued onto the pine boards with Liquid Nails, capitalizing on the pallet’s natural wear and nail holes for added aesthetic value.
These easy-to-make signs bring a unique and vintage touch to Halloween decorations.
Project details: chalkboardblue.com
22. DIY Halloween Pallet Pumpkins

DIY pallet pumpkins are a quick, easy, and affordable way to add some rustic charm to your home.
You can make them in any size you like, and they require no tools or special skills. Just paint them in any color you like, add a few simple decorations or scary faces with spirit of Halloween, and you’re done!
Project details: thecountrychiccottage.net
23. DIY Halloween Pallet Project: Zombie Pit
24. Pallet Ghosts For Font Yard Décor
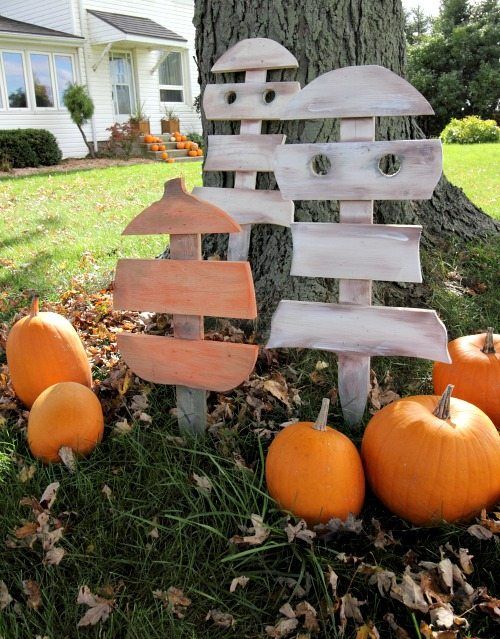
Elevate your Halloween decor with easy-to-make wooden ghost figures for sprucing up your front yard.
This project is both time-efficient and cost-effective, especially if you’ve got scrap wood or old pallets.
To start, you use a brad nailer to attach smaller wood strips onto a longer piece, forming the ghost outline. Cut the shape with a jigsaw, give it a quick paint job for a spooky finish, and you’re ready to decorate.
To duplicate the design, simply trace the offcuts from your first ghost onto new wood strips.
If you’re feeling creative, try making wooden pumpkins too. The project is affordable and a delightful, rustic addition to your Halloween festivities.
Project details: creeklinehouse.com
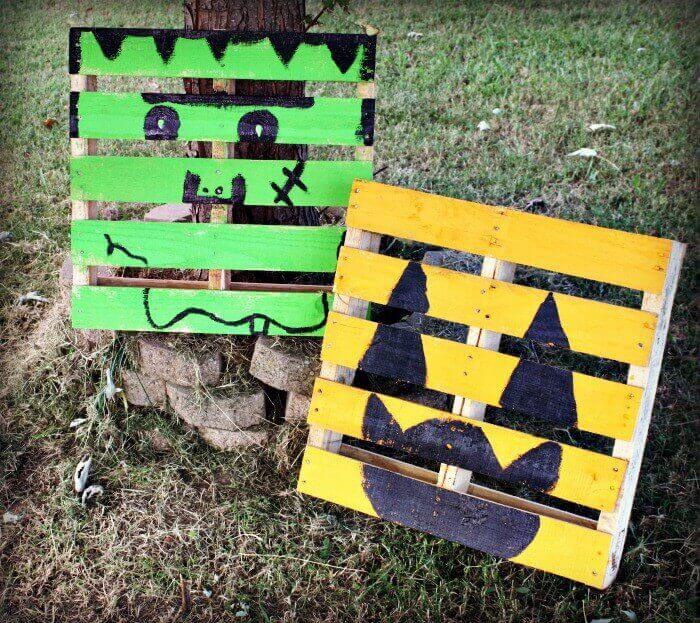
25. Cheap DIY Halloween Pallet Sign
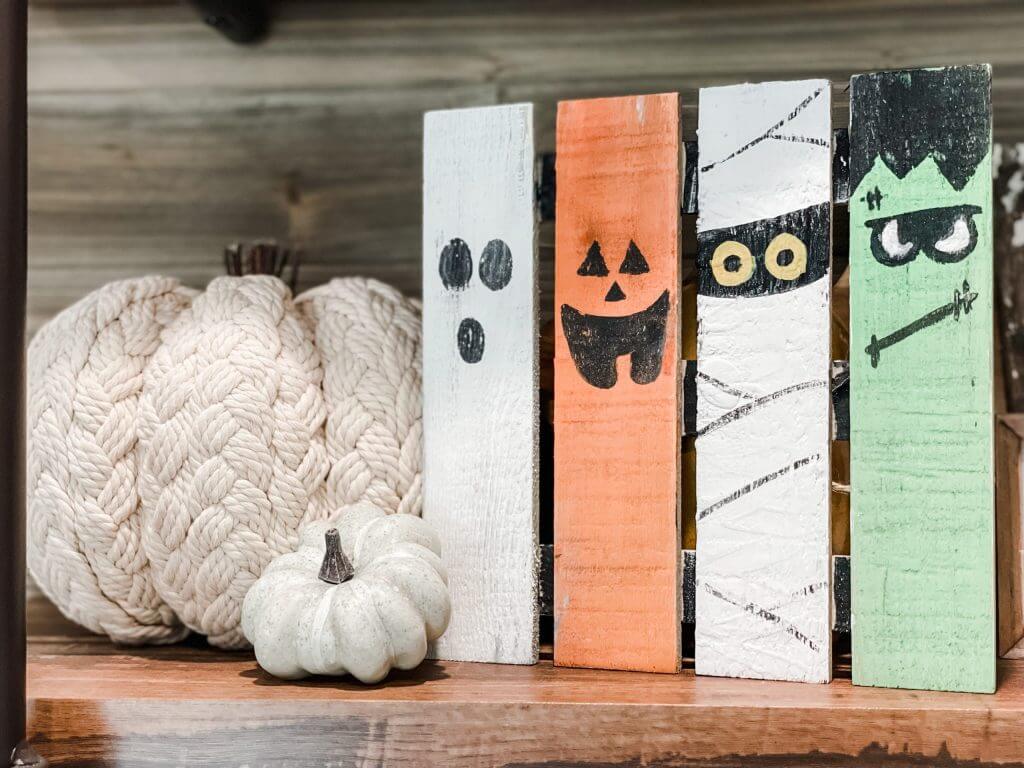
The sign makes out of pallet wood that can be found at most stores. This a great way to add some fun decor to your home at a very low cost.
You will need white, black, and orange paint, as well as green paint for the Frankenstein face.
First, paint each slat of pallet board with a different color. Next, paint on the face to the coordinating slat.
Finally, sand the whole sign down with a sanding block. The sign is easy to create, you can paint and customize it to match your own style.
Project details: re-fabbed.com


