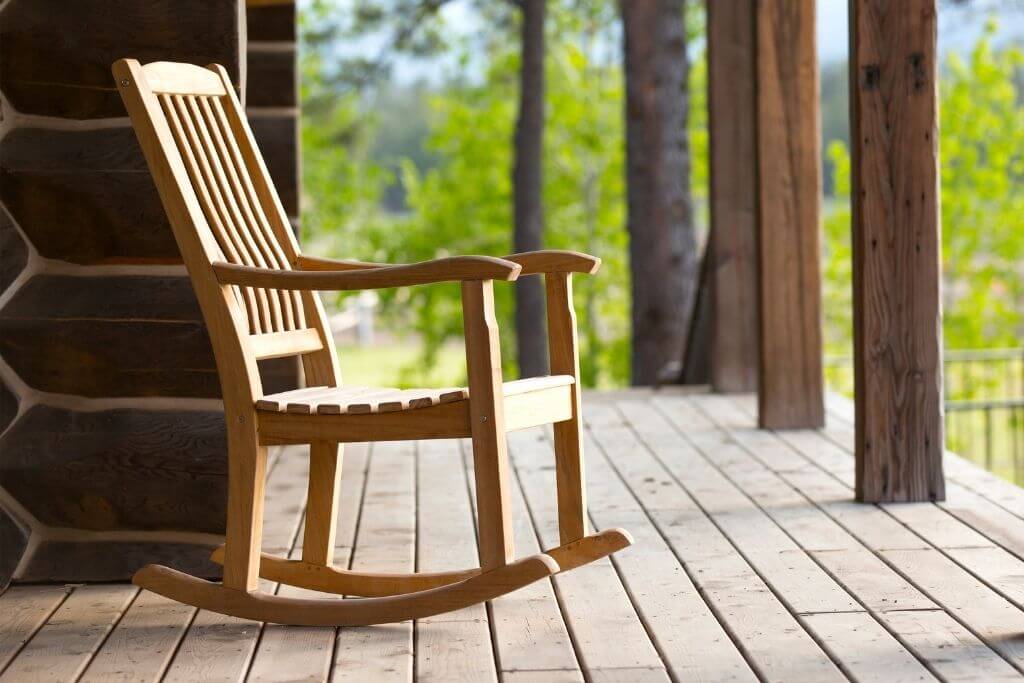
Working in this bustling life makes your time a luxury. But you can always treat yourself to a short chilling time at home with a rocking chair.
To help you with this, we put together 27 DIY rocking chair ideas so that you can make the most well-fitted and comfortable one.
It will save some of your money on buying a new chair. But what does matter is that DIY is a great time for you to relax and forget your busy life.

Table of Contents
- 1. Rocking Chair Plans By My Outdoor Plans
- 2. DIY A Rocking Chair From Design By Studio C
- 3. Plywood Rocking Chair
- 4. Geeks Wood Shop’s Rocking Chair
- 5. The Design Confidential’s Rocking Chair
- 6. DIY Modern Plywood Rocking Chair
- 7. DIY Wooden Rocking Chair
- 8. Outdoor Rocking Chair Plans
- 9. French River Springs’ Wooden Rocking Chair
- 10. Upholstered Rocking Chair
- 11. DIY Kid Rocking Chair Plans
- 12. Jonny Builds’ Outdoor Rocking Chair
- 13. DIY Cable Drum Rocking Chair
- 14. DIY Pallet Rocking Chair
- 15. April Wilkerson’s Classic Rocking Chair
- 16. Modern Rocking Chair By Chris Salomone
- 17. DIY Wooden Rocking Chair Using Cardboard Tubes
- 18. Fine Woodworking’s Shaker Rocker
- 19. DIY Rocking Chair Crib
- 20. DIY Double Rocking Chair
- 21. DIY Rocking Wooden Lounge Chair
- 22. DIY Rocking Chair By Stan’s Plans
- 23. DIY Wooden Pallet Rocking Chair
- 24. Home-Dzine’s Custom Rocking Chair
- 25. DIY Modern Wooden Rocking Chair
- 26. DIY Adirondack Rocking Chair Plans
- 27. Kid Rocking Chair Plans By How To Specialist
- Conclusion
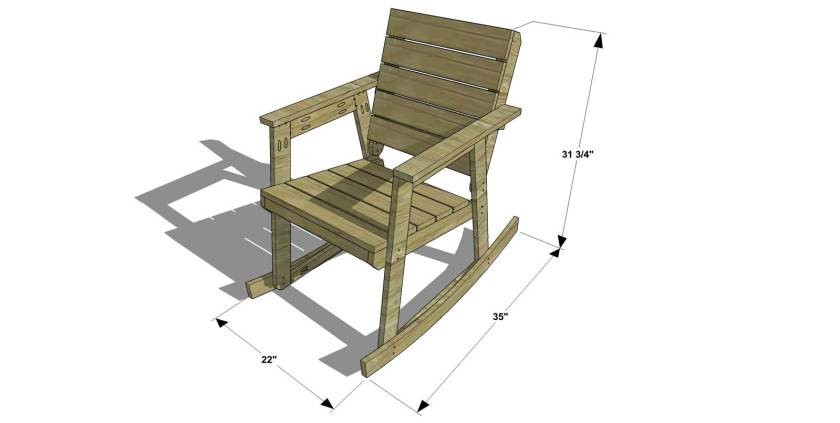
1. Rocking Chair Plans By My Outdoor Plans
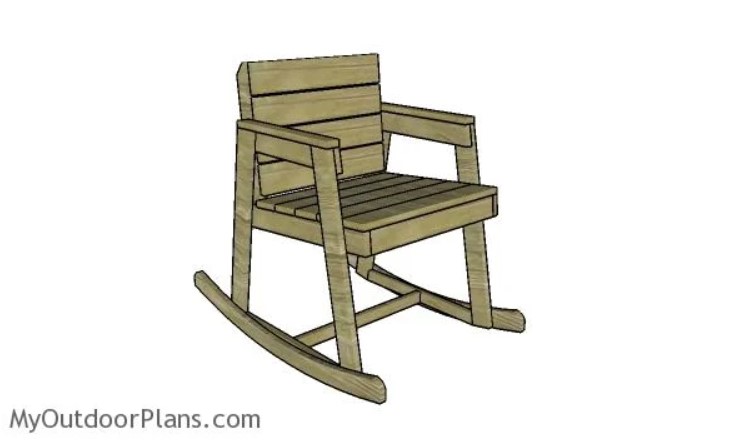
Not all of us start out as professional woodworkers, so we figure that the first project should not be too challenging. This chair is reasonably easy to do, and the tool required is minimal.
It has quite a special base frame, specifically the sides. With this frame, the chair can rock more without the risk of toppling.
To build this side frame, you will need 4 legs made from 1x3s, each having 1 80-degree cut. Thanks to this cut, you can fit these legs with horizontal top and bottom support pieces while still maintaining a trapezoidal shape.
This shape is the strongest at maintaining balance. However, its structural integrity is a little bit lacking.
You can fix this issue by drilling some pilot holes into the joints and adding in 1 1/4″ screws.
Project details: myoutdoorplans.com
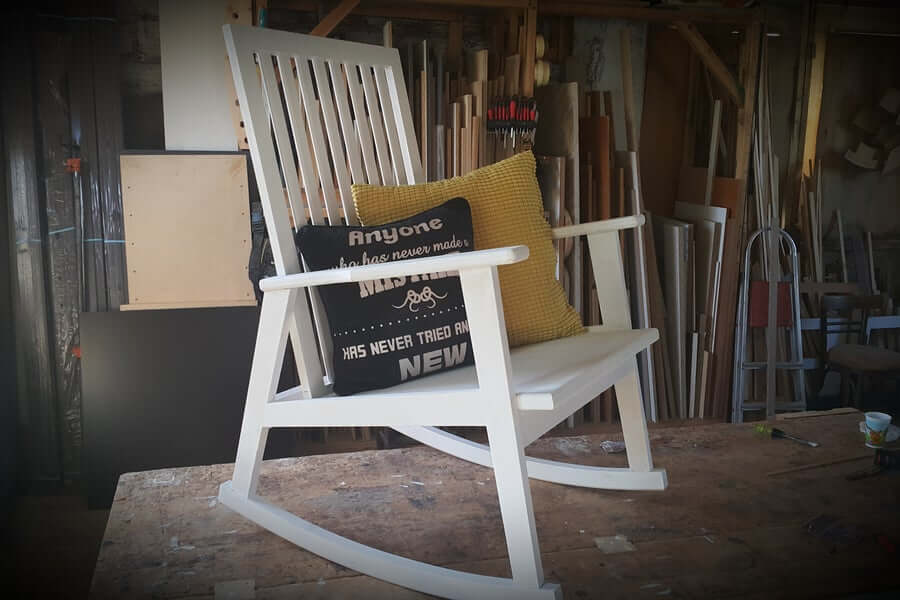
2. DIY A Rocking Chair From Design By Studio C
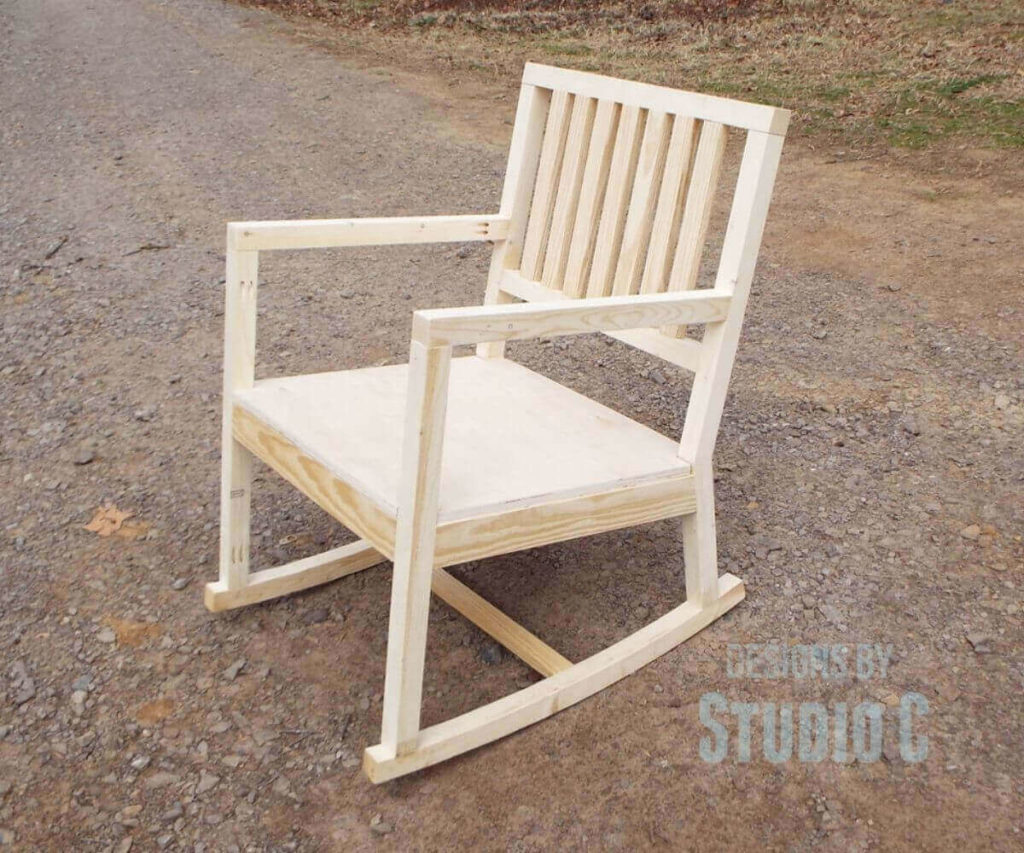
This rocking chair’s selling point is, without any doubt, its incredible sturdiness. With its solid frame, this rocker can accommodate 1 adult and 1 kid at a time with no creaking at all. So, using it to lull your baby to sleep is not a big deal.
Despite this strength, the chair is surprisingly easy and inexpensive to construct. All you need is some 2×6 pieces from the Home Depot’s cull bin, which will be ripped into 2x2s for the back legs and 1x3s to make the aprons.
Use either a jigsaw or a bandsaw to cut through the 2x6s according to the plan’s angles.
If you do a good job, everything will fit together smoothly, forming quite a strong connection. This connection keeps the chair sturdy for quite some time.
Project details: designsbystudioc.com
3. Plywood Rocking Chair
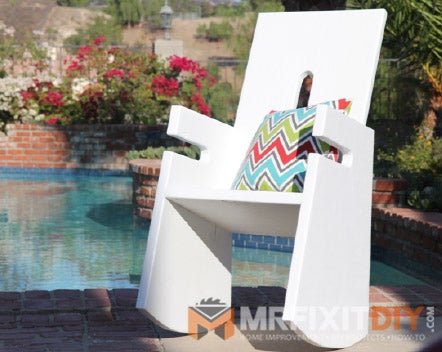
The vertical back slats in classic chairs may hurt your back if sitting for an extended time. If this is the case for you, you can refer to this chair with the back made of a plywood sheet.
This plan is the very first on this list to make use of 1 single plywood sheet to make a completely functional rocking chair.
Yes, you read it right; the only material you need is 1 sheet of 4’x8’ ¾” plywood. As a result, you can save quite a bit on the material budget.
Don’t underestimate it, though, as there are lots of plywood types, allowing for quite a huge range of interesting features.
Here you use marine plywood sheets. They are notoriously sturdier while finish-grade plywood sheets make them cleaner for finishing.
Project details: instructables.com
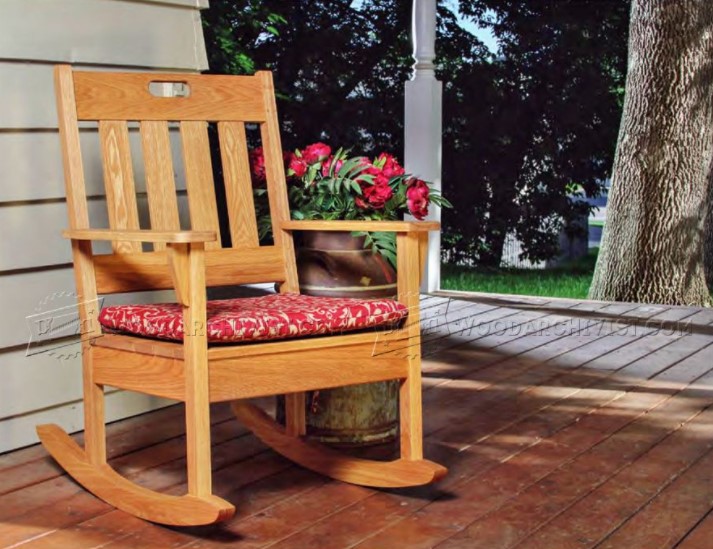
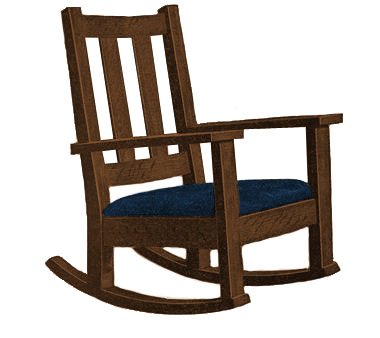
4. Geeks Wood Shop’s Rocking Chair
Most people who have used wooden rocking chairs before report that the slats on the seat prevent them from enjoying the experience fully.
That is no longer an issue with this plan, as it incorporates a cushion seat. As a result, the chair brings forth a supremely comfortable feel for anyone sitting on it.
If you worry about the risk of the chair tipping over due to hyperactiveness or heavy weight, don’t. The backrest is longer than the normal rocking chair, and there are specialized supports.
This design working together with a reasonable ratio between the rocker radius and leg length means the chair will not topple.
5. The Design Confidential’s Rocking Chair
This plan makes use of an interesting mechanism to keep the back of the chair from pivoting.
To be more specific, you will angle the armrest support and the armrest in a specific way. Then, secure the armrest to its support pieces top-down with 1 1/4″ wood screws.
Remember to place the screw so that there is enough space for a second one underneath the support. With this method, the chair looks a lot less bulky.
Project details: thedesignconfidential.com
6. DIY Modern Plywood Rocking Chair
Rather than the usual rocking chair, the result of this project is more of a combination between a lounge chair and a rocker.
The special curved seat and back will support your spine to relieve the back pain. And it also looks way more attractive as a decoration.
To make this chair, the first and most important step is to make the MDF templates. Every single part of this plan is made from these templates, after all.
For example, each leg is 4 templates glued together alongside some plywood pieces cut to the same shape. Thanks to this design, the legs can also serve as the armrest.
7. DIY Wooden Rocking Chair
If you are a fan of sturdy and balanced rocking chairs due to heavy weight, look no further than this plan. It can sustain quite a huge load without breaking, yet the balance while rocking does not suffer at all.
The reason for its sturdiness and balance lies in the front and back supporting rails. Normally, people tend to use the same technique for both processes, but this time it’s different.
The front supporting pieces are fitted together through the mortise and tenon technique, while the back pieces make use of dowel pieces.
Project details: instructables.com
8. Outdoor Rocking Chair Plans
This time, the focus is to make a rocking chair capable of surviving in the outside world.
That is why this plan requires a particular type of wood, which is white oak. This wood is well-known for its resistance against rot, allowing for the chair to last much longer outside.
To improve this longevity, this project requires you to use waterproof glue as well as rust-resistant screws in the assembling process. This combination ensures the ultimate resistance against outdoor damage for the chair.
Prepare a seat cushion, and this chair makes a perfect gift for your family or friends.
Project details: woodarchivist.com
9. French River Springs’ Wooden Rocking Chair
The first thing that you will notice about this rocking chair is that not only the rockers but also the backrest and the seat are curved.
This structure design allows you to have an easier time relaxing, as it provides more contact area.
The only difference is the radius. While the rockers come with a 42-inch radius, the back measures 7 feet. You will make the back frame from a solid wood piece using a band saw. But things are a little complicated for the rockers.
You will make rockers by attaching several planks and bending them using a saddle and clamps. It’s quite time-consuming, but the result will be more stable and sturdy.
This is properly the most challenging part. After that, you only need to screw other components in place.
10. Upholstered Rocking Chair

Instead of having to make everything from scratch, this project allows you the chance to repurpose an accent chair that you aren’t using. We all have an old armchair around, right?
The only thing you need to do is to take apart the accent chair’s base and replace it with a custom base. Start with testing the rocker radius, then check if the leg height is too much.
Finally, build a base according to the results you have obtained. Remember to add the rocker runner height to the legs.
Project details: grayhousestudio.com
11. DIY Kid Rocking Chair Plans
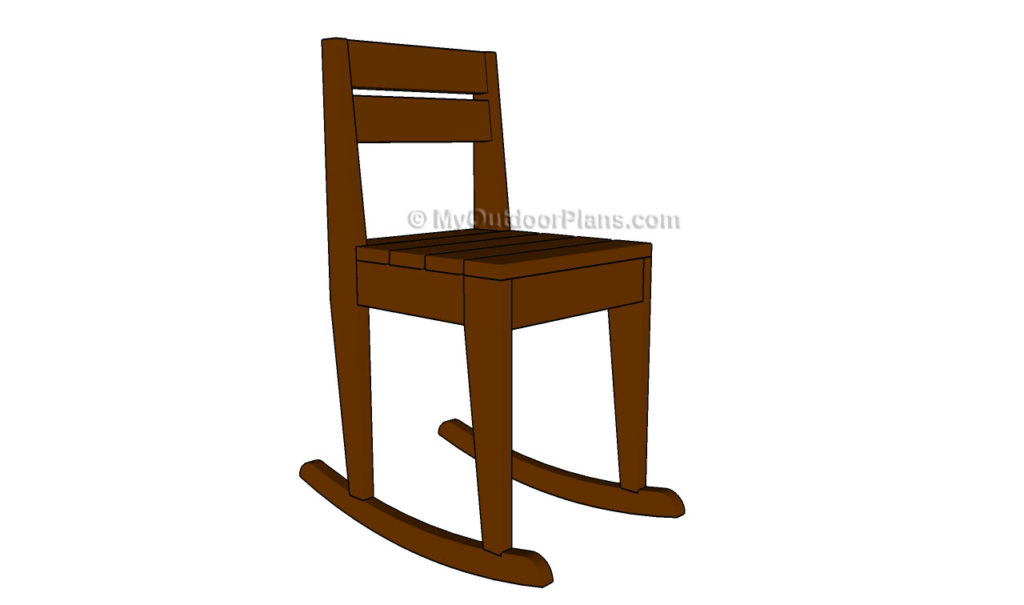
Kids are often much more active than adults, so rocking chairs built specifically for them are different.
First of all, you don’t start with the usual rocker radius, but the legs. We suggest using 1x3s, as they require the least cuts to make the legs.
Then, you build the seat frame directly into the legs. Remember to use galvanized 1 1/4″ screws as well as waterproof glue to ensure a longer service life for the rocker.
Only after you have finished the frame should you start on the rocker. Take a 1×4 board and draw the necessary cut lines on it, then follow them with a jigsaw.
However, ensure that the legs do not exceed 14”, or else there will be a huge risk of crashing.
Project details: myoutdoorplans.com
12. Jonny Builds’ Outdoor Rocking Chair
Rocking chairs are usually not that spacious or even comfortable, but it’s not the case with this project. This can be a chair for you and your beloved one to rest together with space to spare.
Rather than a rocking chair, we feel that it’s more appropriate to call it a rocking sofa, allowing for such a huge space.
Obviously, this huge size means that the base needs to be stronger than what we have seen.
You will be working mainly with 2x12s, 2x8s, and 2x4s. As you can easily see, they are all construction-grade lumbers.
Finally, as it’s outdoor furniture, finish things off by charring the chair Shou Sugi Ban-style.
13. DIY Cable Drum Rocking Chair
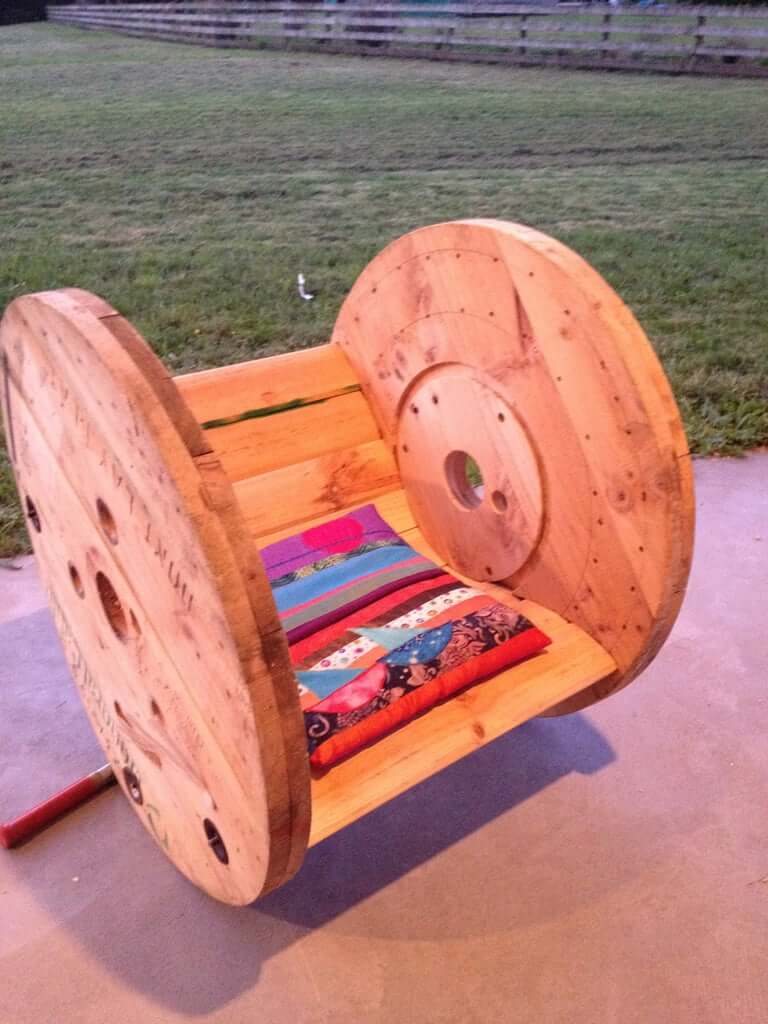
With just one look, you can tell that this project stands out and unique. After all, it has cable drums acting as its legs.
This one-of-a-kind rocking chair could be the bell and whistle of your garden, attracting attention from your guests right away.
Once you manage to get a nice-looking cable drum that doesn’t belong to anyone, dismantle it and remember to keep all the pieces. Route grooves onto the circle so that the drum’s planks can easily fit in and stay secure.
Then, drill holes into the drums for support rods as well as nuts. Due to having metal rods acting as the supporting base, this chair is much stronger than it looks.
Project details: instructables.com
14. DIY Pallet Rocking Chair
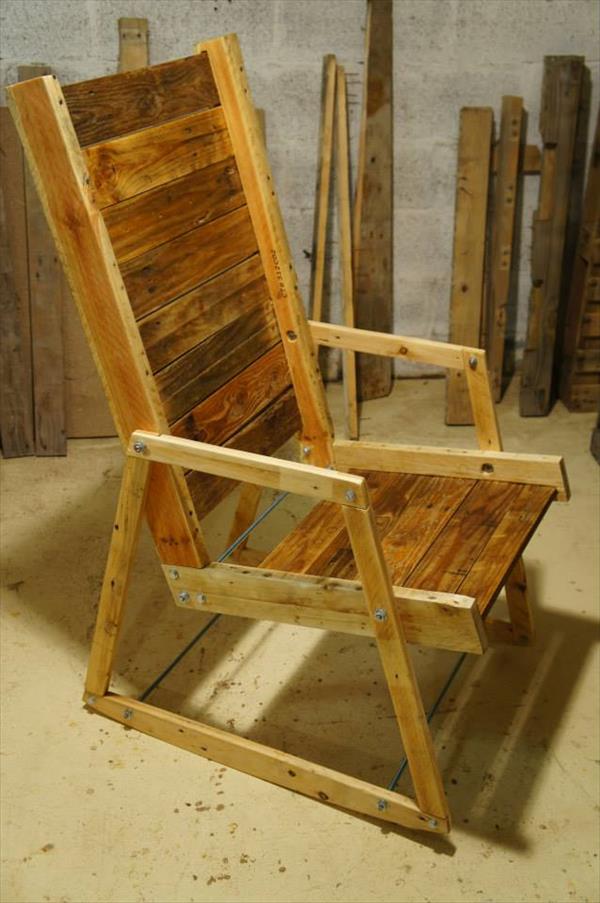
Almost every single DIY-er has some pallets just lying around in the workshop. With this project, you have a brilliant approach to creatively turning them into a functional rocking chair with almost no need for a budget.
The backbone of this plan lies in its “L” shape structure, which can be achieved with 2 pallets, 1 long and 1 short.
Place them according to the shape and fix everything together with screws, ensuring the most powerful support possible.
As a result, this structure can act as both the back support of the whole system and the seat.
Project details: palletfurnitureplans.com
15. April Wilkerson’s Classic Rocking Chair
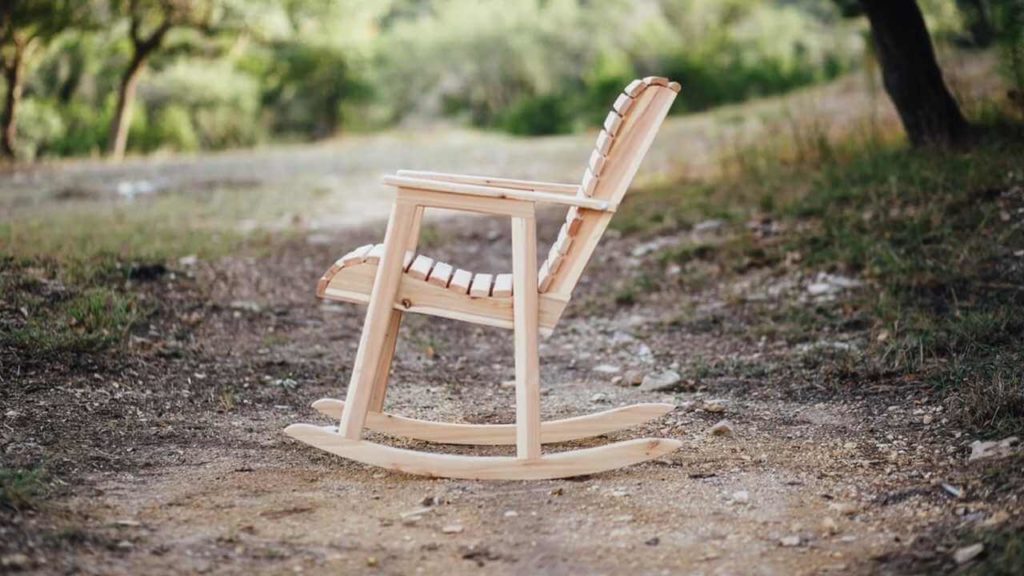
A camping rocking chair. Why not? This plan results in an unbelievably easy to move around yet still extremely durable rocking chair. You can easily bring it along for a picnic or camping.
For portability, the plan makes use of the well-known Western Red Cedar. This lumber is famous for its incredibly lightweight and surprisingly strong structure.
The plan also requires that you use stainless steel screws rather than the usual blind dowels. Doing so ensures that the screws can blend in more and escape weather damage.
Project details: realcedar.com
16. Modern Rocking Chair By Chris Salomone
Unlike most rocking chairs, the more complex part of this project is the seat, not the rocking base.
The seat of this chair has the look of a contoured seat, but there is actually no wood-bending involved. To achieve this contour, there is a small chamfer added between each slat of the seat and the side.
You then improve the shape further by cutting the bevels at some points across the seat. After the re-assembling process, you will notice that it now has a contour.
This design, combined with the 2-in-1 armrests and rockers, makes the chair a skillful, modern and professional workpiece. It deserves a spot in your living room.
17. DIY Wooden Rocking Chair Using Cardboard Tubes
How can we make a wooden rocking chair more comfortable without resorting to cushions?
This project answers this question cleverly with cardboard tubes in the paper rolls, something we usually throw away.
Certainly, these tubes are not strong, so there must be a strengthening process so that they can handle bigger people.
You simply cut a tube into a “C” slice, squeeze it smaller, and stuff it into another tube for a double-walled tube.
Finally, cut the tubes according to your seat’s size and fit them into the frame.
Project details: instructables.com
18. Fine Woodworking’s Shaker Rocker
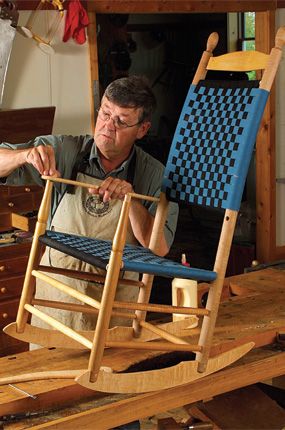
Now we have a challenge for all DIYers who want to test their skills.
This project serves as an amazingly well-rounded introduction to numerous advanced woodworking techniques, despite its simple design.
You will be able to familiarize yourself with shaker weaving, as both the back and seat are made from shaker tape.
Another technique that you can habituate to is spindle turning. After all, most parts, aside from the curved back slats, arms, and rockers, require lathe turning.
Also, you get to try out steam-bending without having to invest in professional-grade equipment.
Project details: finewoodworking.com
19. DIY Rocking Chair Crib
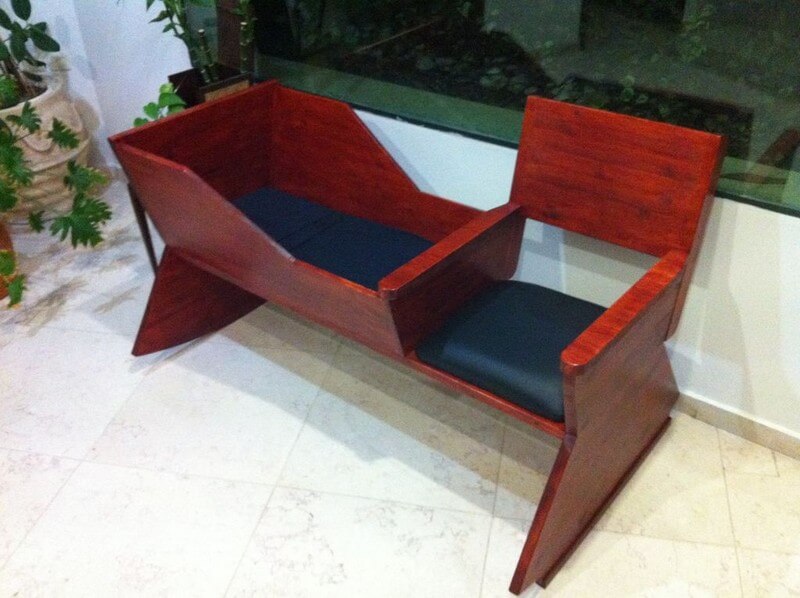
People with babies know just how nightmarish our little angels can be. With this plan, you can build a chair to relax that can also double as a crib for your little one.
A special point of this plan is the fact that one side of the crib’s barrier can act as an armrest for the chair. This unique design allows you to save both time and materials.
The name is quite self-descriptive. You’ll build 2 wings of the crib, the back board, and the 2 sides with curved rockers. Then, simply attach them together.
Project details: project.theownerbuildernetwork.co
20. DIY Double Rocking Chair

Building a double rocking chair is a great way to spend time with someone you love. Not only is it a comfortable and relaxing experience, but it can also be a fun project to do together.
It’s quite easy to build, with graceful curves and comfortable contours, and it looks much more complicated than it really is.
This plan from Yellawood makes the process easy, with straightforward instructions and diagrams.
Project details: yellawood.com
21. DIY Rocking Wooden Lounge Chair
The concept of this chair is not focused on rocking but more on being stable with a little bit of motion. After all, you are supposed to lie flat on it, not sitting.
That is why it has arguably the longest rocker radius with an amazingly short leg length.
The ratio between these two factors is so small that you need to apply a considerable amount of force for the chair to start rocking.
In exchange, the whole system is fairly stable, and lying completely on top of it creates enough force to move the rocker.
It can serve as the perfect lounge to laze around while enjoying a movie night.
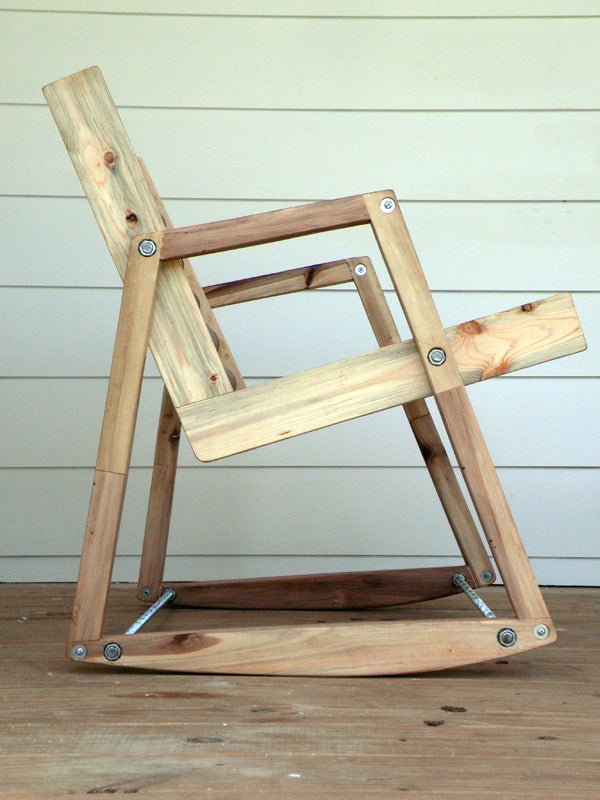
22. DIY Rocking Chair By Stan’s Plans
One of the worst aspects of rocking chairs is the fact that they are prone to slivering.
You can find a decent solution to this issue here. This plan requires you to chamfer the edges of the posts, both top and bottom.
You can clearly see that the armrests’ shape is not of the typical style you would expect. However, they can be made if you follow the instructions and add in 1 slightly curved cut into each of them.
The most vital part is the curved components in the back. After cutting them to size, you need to bend and steam them thoroughly so that they can achieve the ideal surface curve
Project details: stansplans.com
23. DIY Wooden Pallet Rocking Chair
This chair is made completely out of pallet woods, saving you lots of money and time. However, pallets are not exactly the most suitable material for chairs in general, due to their rough surface.
To combat this issue, this plan asks you to cover the seat all the way down with pallet planks, leaving almost no gap between them.
Then, you run a screw-driving polishing machine through the whole thing, sanding down all the rough parts.
The backseat is made from 4 of the biggest pallet planks connected by 3 support pieces. Don’t underestimate its strength, though, as it can withstand a surprising amount of weight.
Project details: palletswoodenprojects.com
24. Home-Dzine’s Custom Rocking Chair

This rocking chair has quite an interesting design of incorporating everything into 1 single piece.
The whole structure is supported horizontally by 49 pieces of meranti dowels. As a result, the chair is deceptively strong, capable of supporting even the biggest of people.
Start by cutting 4 side panels from 1 plywood sheet (you can download the template from the instructions). Then drill 49 holes on 2 panels’ edges. Measuring should be careful so that the spacing between dowels is consistent.
The 2 drilled panels will be the inner part of the side so that the outer remains smooth. Now, you have all the “ingredients”. Just glue and screw them together.
You will never need to worry about this chair’s dowels suddenly snapping out. They are securely fixed into the frame with the help of wood glue panel pins.
Project details: home-dzine.co.za
25. DIY Modern Wooden Rocking Chair
This rocking chair makes from beech wood, which is a great material for bending.
You will learn how to bend wood without the help of a steam box, and apply this technique to other projects in the future.
The chair will also be fastened with wooden dowels, and painted with natural oil to protect and preserve the wood.
This chair will have a modern design, and it’ll be a great addition to any home.
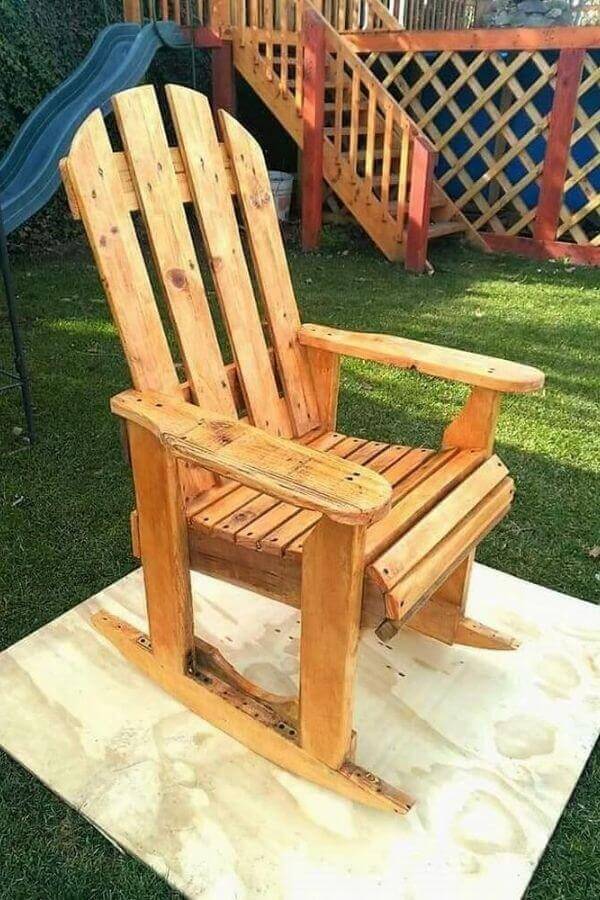
26. DIY Adirondack Rocking Chair Plans
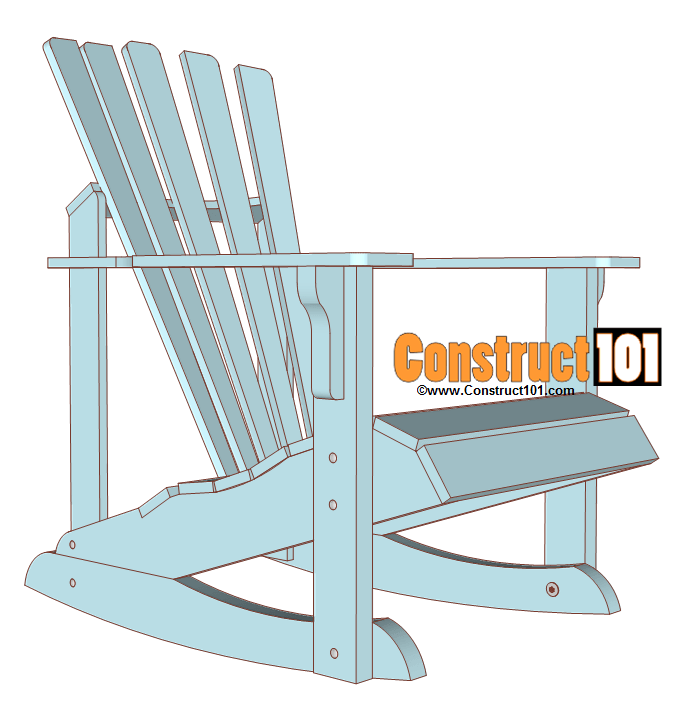
The Adirondack rocking chair is a type of chair that is perfect for both indoor and outdoor use.
This plan provides a simple, easy-to-follow guide on how to make a comfortable and stylish rocking chair. The plan also includes diagrams and pictures for clarity.
The rockers are adjustable so that you can customize the fit of your chair, and the seat slats are made from 1×4 boards for strength and durability.
The front and rear legs are made from 2x4s, and the whole chair is screwed together for easy assembly.
The arm brace is also adjustable so that you can get the perfect fit for your arms, and the back slats provide support and comfort.
Project details: construct101.com
27. Kid Rocking Chair Plans By How To Specialist
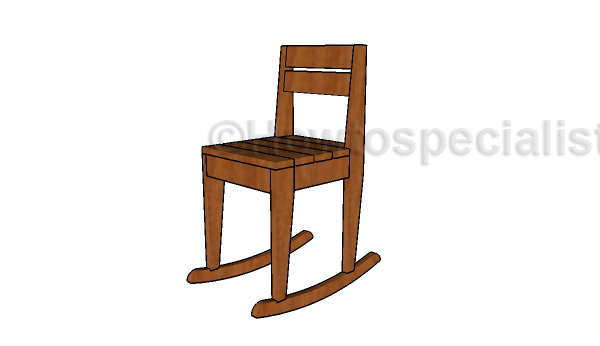
Busy parents will appreciate this straightforward project. It is simple enough that you can finish the whole thing in under a few hours.
The whole project can be divided into 4 processes: frame building, rocker building, slat attaching, and finishing. Of them, the unarguably most challenging part is the frame, as it will decide the comfort of the chair.
To ensure that this frame is as strong as possible without having to use too many screws, try to use 1x3s and drill pilot holes with 11 inch long slats, as they have the best structural integrity.
Project details: howtospecialist.com
Conclusion
A rocking chair is helpful when you need to relax or if you have a baby so you should have one at home.
We have introduced you to a list of 24 chair plans that you can build. Each of the projects included has its own advantages, disadvantages, and different styles.
Some of them are easier to make with fewer requirements on materials as well as tools.
On the other hand, the others are more demanding on both time, tools, skills, and experience. But the result is much more sturdy, looks great, and longer-lasting.
We hope that you can decide on a project most suitable for your situation and start building right away.


![9 Best Pole Saws of 2023 [Ultimate Guide]](https://handykeen.b-cdn.net/wp-content/uploads/2021/03/best-pole-saw-300x200.jpg "9 Best Pole Saws of 2023 [Ultimate Guide]")


