If you want your Kayak to last for a long time, you must store them the right way. A DIY Kayak rack will help.
You can not only cut down the storage cost but also customize the rack’s design and dimensions depending on the number of Kayaks available.
In this article, we want to share with you 34 DIY plans and ideas for kayak racks. You can make it today without needing many tools and skills.
Check them out now!
Table of Contents
- 1. DIY Kayak Rack From Driftwood
- 2. DIY Wooden Kayak Rack Plans by My Outdoor Plans
- 3. DIY Canoe/Kayak Storage
- 4. DIY Wooden Kayak Storage Rack
- 5. Building a Kayak Rack – Yak Rak
- 6. Quick and Easy DIY Kayak Rack
- 7. Kayak Rack Plan In 5 Steps From Instructables
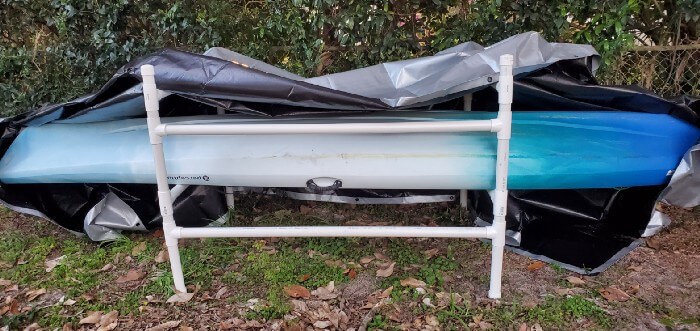
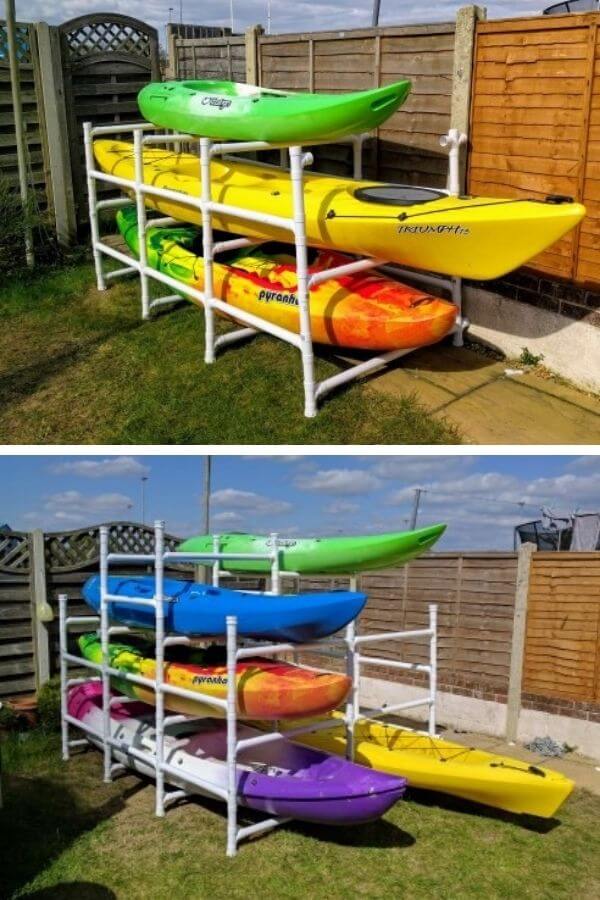
- 8. DIY Kayak Storage Rack Using PVC Pipe – Cheap & Easy!
- 9. Simple Kayak Rack From PVC
- 10. DIY Kayak Cart
- 11. Diy Kayak Wall Hanger Kayak Storage
- 12. Kayak / Bike Rack Storage Center
- 13. DIY Kayak Rack – 15 Min Build
- 14. DIY Kayak Rack Less Than $100
- 15. DIY PVC Kayak Rack With Parts List & Assembly
- 16. DIY Kayak Storage Cheap By Born Handy
- 17. PVC Kayak Roof Rack/Carrier
- 18. DIY Kayak Rack for Storage and Transport
- 19. Rolling Kayak Storage System
- 20. DIY Summer Project: Canoe and Kayak Rack
- 21. DIY Kayak Rack For Home Storage
- 22. DIY Kayak Rack By ZakHoover
- 23. DIY Kayak Rack To Hold 3 Kayaks
- 24. DIY Kayak Storage: ABS Pipe Kayak Rack
- 25. DIY Outdoor Kayak Storage Rack
- 26. Easy DIY Kayak Rack By Alex Barham
- 27. Kayak Rack Build With Three Shelves
- 28. DIY Kayak Rack For Garage
- 29. DIY Kayak Rack Free Plans
- 30. How To Build a Kayak Storage Rack By Jim Thomas
- 31. Kayak Rack out of PVC
- 32. Make a PVC Kayak Stand By Rated Red
- 33. Easy DIY Kayak Stand
- 34. DIY Wood Kayak Rack Storage With 8 Kayaks
- Conclusion
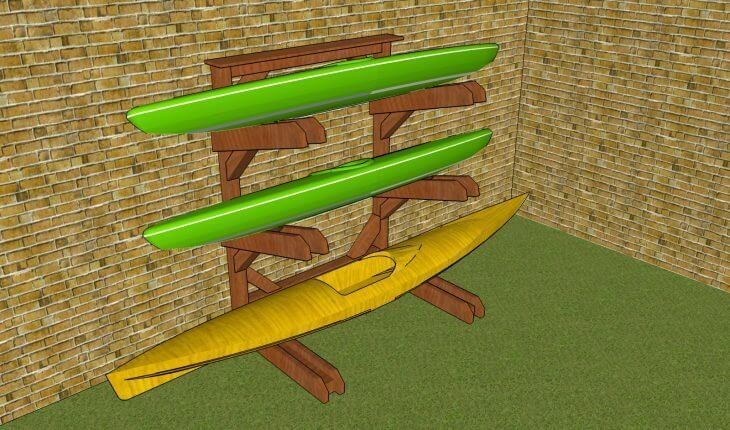
1. DIY Kayak Rack From Driftwood
The approach of this project is to build a frame of two pressure-treated posts sitting apart from each other for 8 inches.
Then, tie them with two exterior lag screws. That way, you will have a substantial base to support your boat.
The second part is the driftwood of the remainder. You use two posts at the top racks with a large rectangle and a 2×6 driftwood for the leg supports.
They get secured together – 36 inches extending from the rack’s front and another 24 inches behind.
Complete the project by assembling the 2×6 driftwood arms, 24 inches extending forward from the posts!
Project details: oldtownhome.com
2. DIY Wooden Kayak Rack Plans by My Outdoor Plans
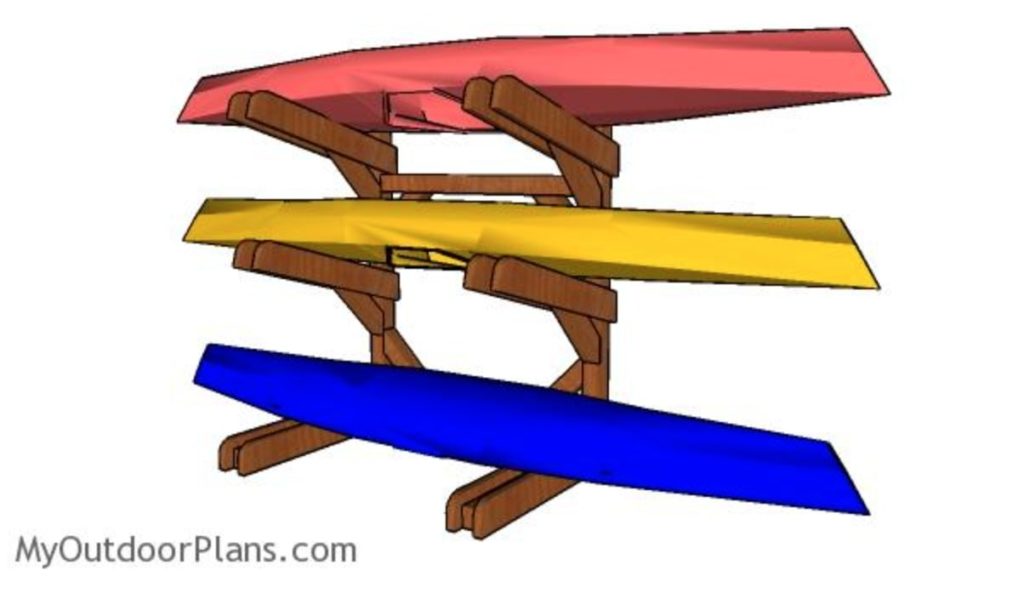
Featuring double-built legs and shelves, this is a sturdy Kayak rack that will last for years.
Get started by building the base from four 2x6x60-inch and two 4x4x38-inch wood pieces. Fit other 4×4 posts between the beams to make sure the corners are square before plumbing the posts vertically.
Repeat the process with the middle and the top levels, and you will complete the project.
Project details: myoutdoorplans.com
3. DIY Canoe/Kayak Storage
Your boats will not take up more storage space if you put them on a wall-mounting rack.
The construction is simple and cheap enough to create a place to store your canoe and kayak with some 2×4 wood pieces.
The first, you will need to strap some screws to the wall and find some studs behind your sheetrock to lay another 2×4 piece flat onto the first pieces.
Get a set of two rungs on the two sides of the second wood piece; each rung is 5 inches thick. Use bolts to link the two ends of rungs.
Place another set on the other wood pieces parallel with the first one to create a shelf for your boat.
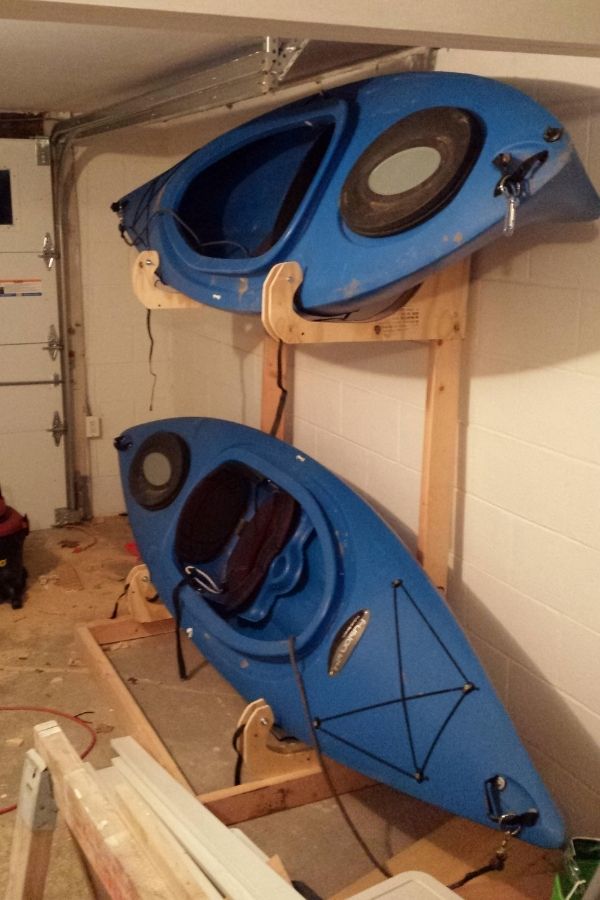
4. DIY Wooden Kayak Storage Rack
You plan to have two or three Kayaks? So, this project is for you.
You will need massive Cypress boards of 16 feet long and cut them into 2×6-inch rough lengths.
When the dimensions are correct, continue cutting all the joineries and legs, and it is ideal for adding a curve beneath the legs.
There are six arms to hang your rack, every three on each side. You can make them as simply as strange boards connected with 45-degree supporting panels. Otherwise, cut curves and sand the boards smoothly then.
Go through all steps, and you will have a perfect kayak rack! Also, you need intermediate woodworking skills, some cutting and shape tools to finish this project.
Project details: craftedworkshop.com
5. Building a Kayak Rack – Yak Rak
Another idea is to build an excellent storage rack to hold two of your kayaks. It would be great if you had cutting tools available as miter saws and circular saws.
Prepare two end posts to the length and cut the notches where you will attach your holders’ arms. The distance between two notches should be a bit bigger than the height of your boats.
Continue with the arms, making out 2×4 pieces to the width of your kayaks. Along those pieces are the stop blocks available for diagonal cuts. Each arm has a 45-degree support piece.
Put all parts together using the exterior solid wood glue and pre-drilled holes.
6. Quick and Easy DIY Kayak Rack
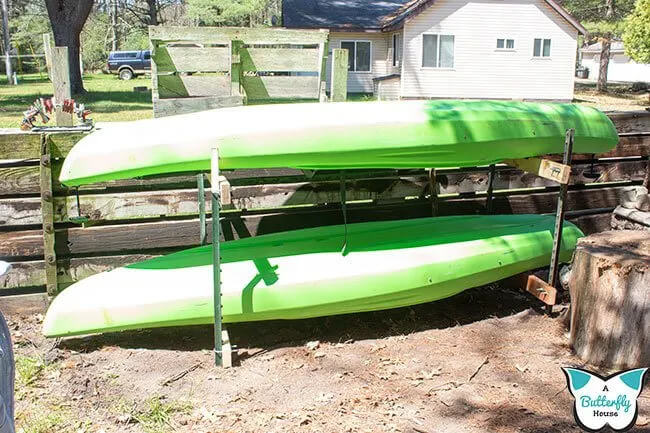
This project is an outdoor rack available when you desire to get the kayaks out of your garage. It includes four 72-inch T-Posts, eight U-Bolts, 2×4 scrap wood pieces, and a chain and padlock to secure your boats.
Bolt and drive T-posts into the ground. A helpful tip is to ensure the in-between distance is larger than the boat’s width so that you can easily slide the kayak into the rack.
Project details: abutterflyhouse.com
7. Kayak Rack Plan In 5 Steps From Instructables
Instead of wood pieces, you can make the rack from the metal bars last longer with less maintenance.
You will need to cut three identical vertical panels connected by horizontal braces. Cut all pieces to 90 degrees and 45 degrees and combine with a bench grinder or an angle grinder.
Mark and drill holes where you will tie down the eye-bolt and braces to form the rack.
With this plan, you also can store your kayak on the truck bed when need to transport it.
Project details: instructables.com
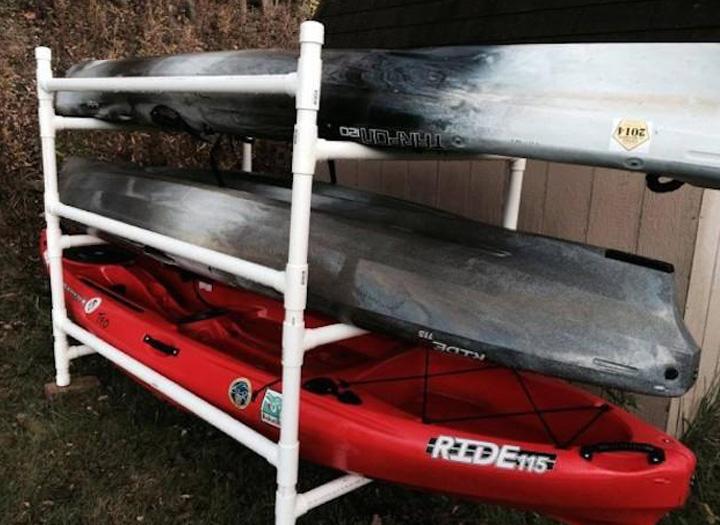
8. DIY Kayak Storage Rack Using PVC Pipe – Cheap & Easy!
You can reuse PVCs you had to make your kayak rack. It is much easier than using the wood pieces since you can cut the pipes and glue them with tee joints and duct tape in a breeze.
The supplies include two PVC pipes of 3 inches wide and 120 inches long, serving as the outer frame of the rack, and another two smaller tubes – around 2 inches wide to form the shelf supports. For holding arms, you will need six 30-inch sections.
You also need to prepare T-shots to install the pipes in a U-shape frame with the support pieces in between and the arms forward. Put the pre-cut plywood sheets above the arms to hold the boats.
9. Simple Kayak Rack From PVC
For those who hardly have woodworking experience, the PVC kayak rack project will save you a bunch of time and effort to cut and sand the wood pieces.
Rather than that, you can buy pre-cut pipes to lengths, PVC T fittings, end caps, and PVC glue for all purposes.
The sizes and the number of pipes will depend on your available storage space, the number of kayaks, and their dimensions.
For your reference, the cut list of this project includes six 60-inch pipes, six 36-inch pipes, eight 24-inch pipes, and twenty 4-inch pipes. It can storage to 3 your Kayak
You can insert a concrete deck block under each post to prevent it from sinking into the ground, or you can even put wheels to move the rack around effortlessly.
Project details: wildernesssystems.com
10. DIY Kayak Cart
A 2-in-1 kayak rack is a convenient DIY to store your kayak and gear. It can also turn into a simple bench to sit on the car’s trucks when transporting the kayak around.
It contains four legs screwed inside a rectangular frame. The sizes of legs and frame depend on the size of your boat, but they should be all 2×4 lumbers and 4×4 for posts. Under the legs are rolling chassis carts for transportation purposes.
Fit a shelf around the bottom frame where you can put the other tools like fishing rods, etc. On the top of the legs are the two long and smooth lumbers to support the weight of your kayak and keep it balanced.
11. Diy Kayak Wall Hanger Kayak Storage
Don’t need a larger installation area. You only spend a corner of the house on setting up a wall-hang Kayak rack.
Each hang rack features a tube bent in different angles and distances so it will form a U-like shape to hang your boat and prevent it from falling.
Screw the metal tube into the wall near the bent joint, using washers, bolts, and 2.5-inch lag screws.
To strengthen the tube, you can even buy a noodle and put the tube through its hole. In this project, the tube is three-quarters of an inch thick.
12. Kayak / Bike Rack Storage Center
It looks bulky and big, but this project instructs how to build a big Kayak rack from several simple steps.
There are two shelves available: The top shelf holds the boat, and the bottom shelf is to put your gears.
The first step to creating this rack involves creating the base from 4×4 boards. You have to chip out the rear panel and nail it with the middle baseboards.
Add the 2×4 scrap pieces above the base and attach with pocket hole screws—next, upright the rack with four legs and top rails where you can hold the boat.
In particular, there is a bike rack 12 inches out from the base where you can hang your bicycle when it is not in use.
Project details: instructables.com
13. DIY Kayak Rack – 15 Min Build
Why do you use ample space on your wall to store your boat vertically next together and on this Kayak rack? This is a smart idea.
The rack features two or three straight 2×4 wood pieces which are directly drilled into the wall. Each piece is 90 inches.
Measure and cut three scallops cut-out pieces. Each cut out is 28 inches wide and two inches from one another. Line up the scallops pieces onto the previously-drilled pieces and screw them in.
Put one end of the kayaks into the cuts out, and you are good to go!
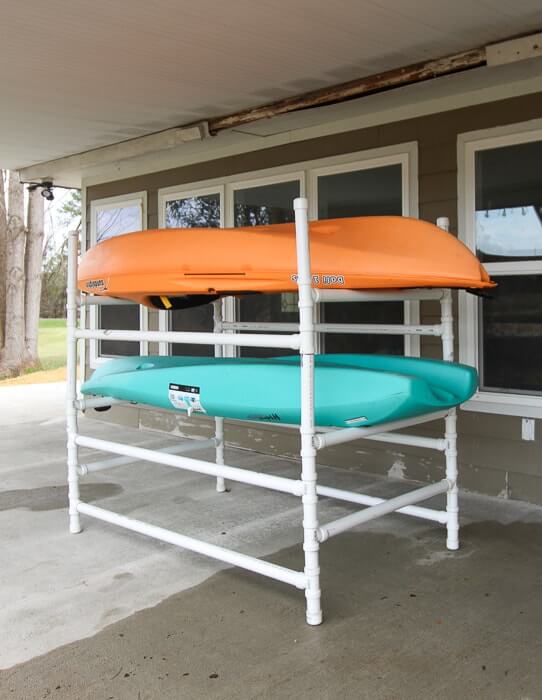
14. DIY Kayak Rack Less Than $100
As its name suggests, this project is built from all affordable materials, making it ideal if you only have one kayak rack to store.
Minimal supplies include sixteen 1.5-inch tees, eight 1.5-inch end caps, and five 120×1.5-inch 40 PVC cut in four 60-inch, four 36-inch, eight 12-inch, as long as another twelve 4-inch pieces.
If convenient, you can also buy additional PVC cement and primer.
After you cut all pieces, assemble the 12-inch cut as the bottom. Wipe the primer around the edge before you apply the cement.
Then connect the bottom piece with the tees to accommodate vertical and horizontal framing pieces.
Wait for all cement to dry so all cuts are firmly attached together to form a perfect rack!
Project details: rannaedawn.medium.com
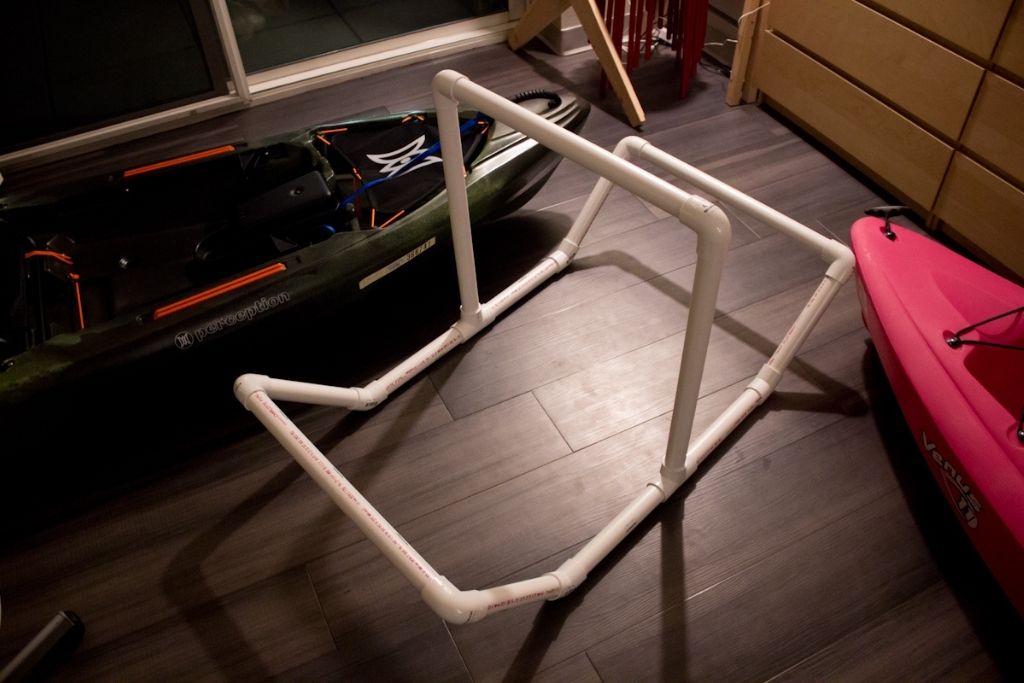
15. DIY PVC Kayak Rack With Parts List & Assembly
The whole project comes crafted from pipes cut to different sizes and also the PVC tee. You will not need glue or nails.
What to prepare consists of six 1.5×33-inch PVCs, six 1.5×58 PVCs, eight 1.5×17-inch PVCs, and fourteen 1.5×3-inch PVCs and 24 PVC Tee.
Line up the pieces according to the template of the projects and build to identical boards.
Stand them up and insert the pipes in the connectors. The in-between pipes will serve as the support shelves to hold your boats.
16. DIY Kayak Storage Cheap By Born Handy
The fact that conduits are very sturdy and easy-to-shape makes it possibly serve as a Kayak mounting rack on the wall-mounted.
Main supplies are a half-inch electrical conduit metal, half-inch conduit clips, and two 8×8 plywood sheets.
Do not forget to borrow a conduit bender from your electrician or plumber friend. Or you can buy it for around $30 bucks.
Use the bender to bend the conduit to a 45-degree angle on the two ends. Repeat the process to create U-shaped curves. Finally, install the two ends onto the board and the wall.
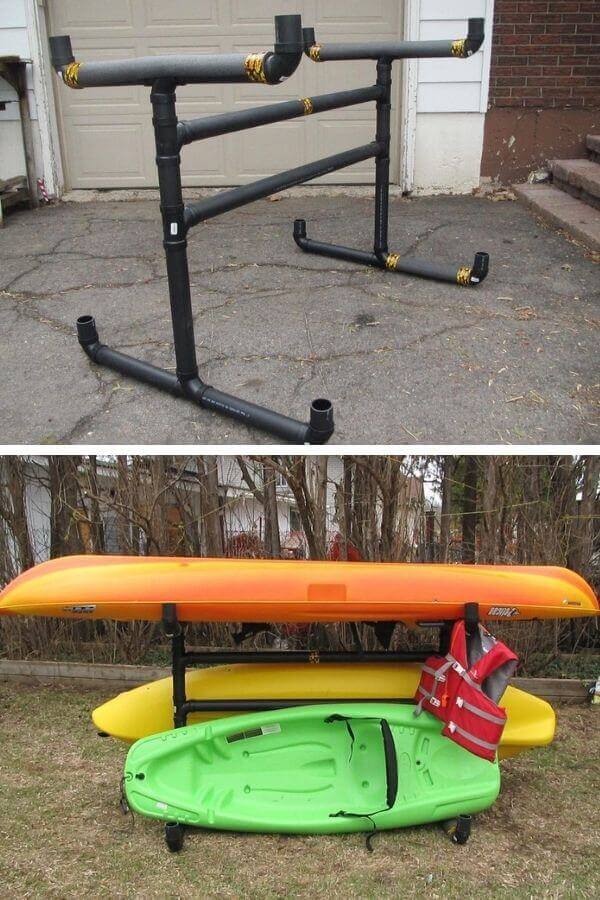
17. PVC Kayak Roof Rack/Carrier
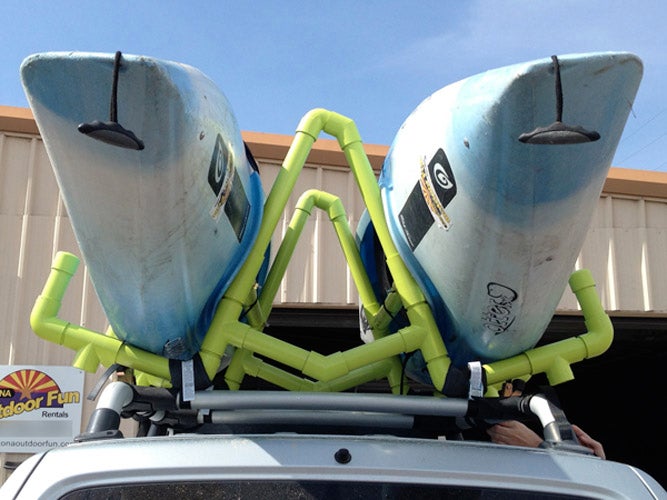
The DIY PVC Kayak Roof Rack is an affordable alternative to the roof racks to transport the boats around for a beach paddle trip.
As its name suggests, the project includes all PVC pipes which are 1.5 inches in diameter, two 90-degree street elbows, ten 90-degree elbows, four 45-degree elbows, twelve T-junctions, four caps, a PVC pipe of 20 feet, primer and cement.
Cut and label the segments according to the template of the project. A tip is to rub some wax on the pipes so you can assemble the pipes more easily. Remember to use hot water to clean off the wax then.
Project details: instructables.com
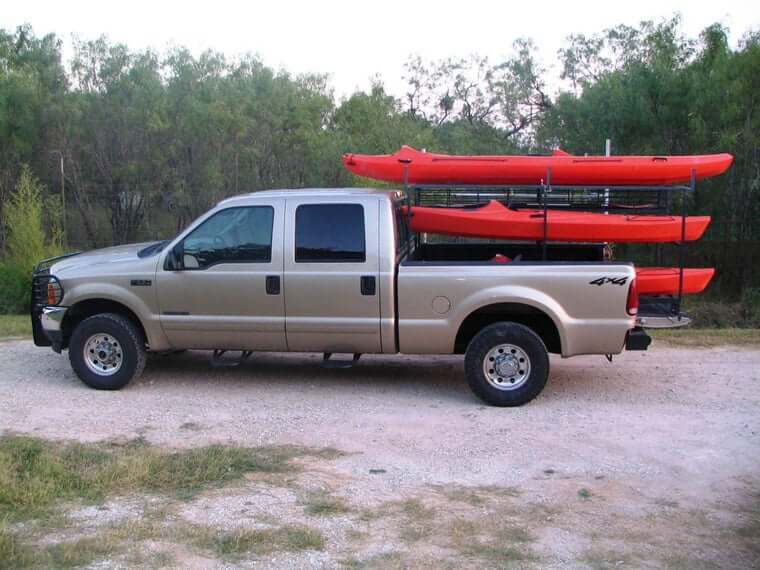
18. DIY Kayak Rack for Storage and Transport
This is a great idea to learn how to make rack storage to transport in the trucks from PVC pipes of 1 ¼ inch, T adapters, end caps, and 90-degree elbows. It can store four kayaks.
The size of pipes can be various, based on the size of your truck’s bed. They must snug fit so that the rack will not slide out while driving.
To improve the durability of the rack, I would recommend painting it with water-proof color. Even better, buy foam noodles to cover all pipes so that they will not scratch your lovely truck’s bed.
19. Rolling Kayak Storage System
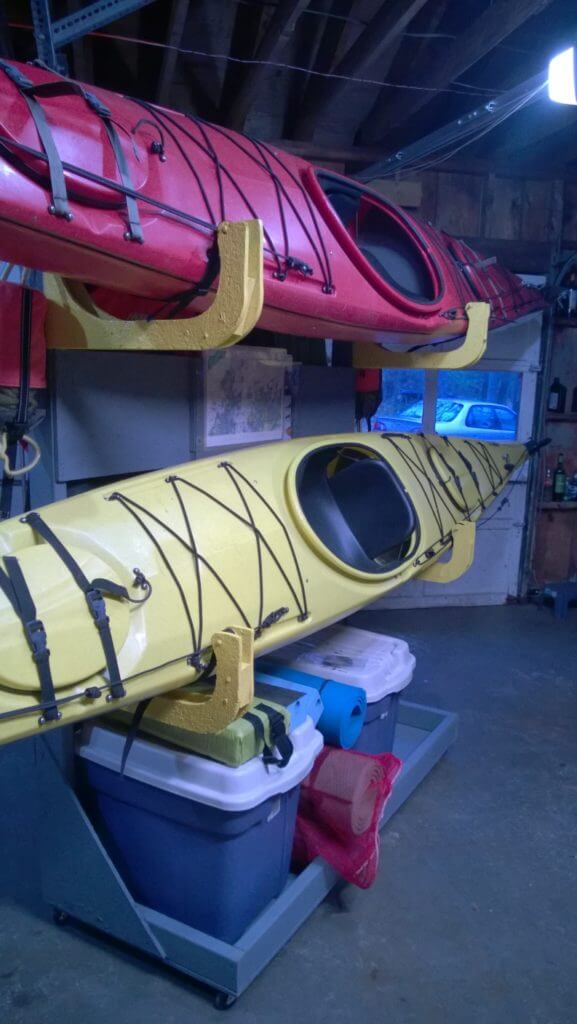
The rolling storage provides two separate parts – one for the kayak and another for gear such as wetsuits for paddling jackets. Both racks can get rolled out of your garage when needed.
You will need three panels per rack; each is 16×48 inches – enough to interleave three-arm brackets at a time.
The brackets of this project are at a 60-inch centerline, and you can adjust its size depending on your particular boat. Install the brackets on the rack with 2-inch cutting holes and 2×4 stringers.
Project details: mita.org
20. DIY Summer Project: Canoe and Kayak Rack
This Canoe and Kayak Rack project is a big size and you will need some friends to help with cutting and assembling all parts.
What we like the most about this rack is its huge roof. You need incredible muscle efforts to joint lumbers to form the frame of the roof. Then, nail and screw big wood panels to cover the roof.
With such a construction, the rack is ideal to store the boats outdoors all year round regardless of rain or sunny!
21. DIY Kayak Rack For Home Storage
We will never get bored with the Kayak pipe racks, considering that the pipes are cheap and easy to install.
This project is no exception. It inspires you with a DIY rack made in around an hour with 4×4 posts and simple plumbing pipes
The two posts for your reference are 10 feet long. You will need to dig them five feet apart and pour some concrete mix around the posts to keep the poles in place.
Screw the 24-inch pipe into the flange and add the pipe connector. Continue with the 90-degree elbow to the connector’s other end and add the cap to the other open end. The final step is to secure the two brackets to the posts.
Project details: rustic-crafts.com
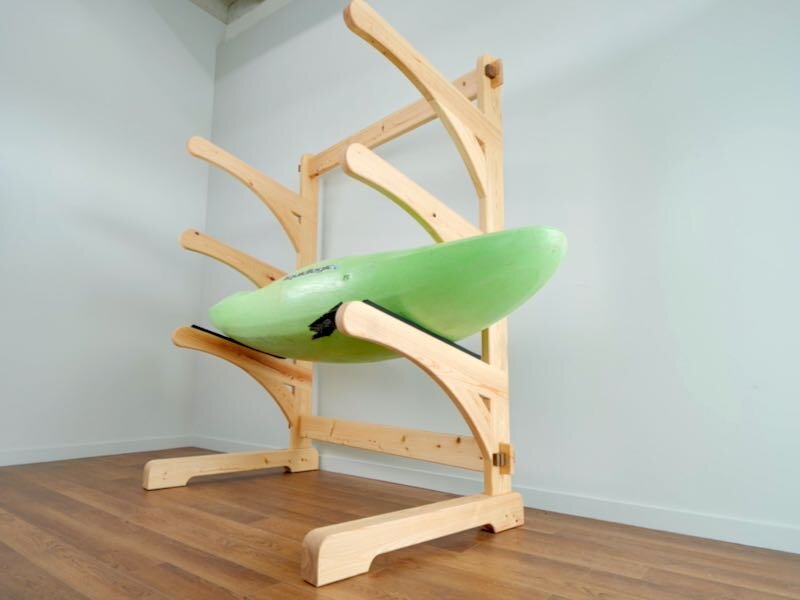
22. DIY Kayak Rack By ZakHoover
This DIY rack requires an intermediate woodworking experience since the braces have a complicated shape. They can hold the Kayaks safely. Plus, you can still take them out quickly when needed.
You had better download the template available in the project and cut the four identical wood pieces out of the template.
Bolt two braces by 5/16 hex bolts to form a trapping shape before you can corner the braces with screws to complete the rack.
Project details: imgur.com
23. DIY Kayak Rack To Hold 3 Kayaks
Build a big rack such as the one in this project so that you can hold several kayaks comfortably.
The items needed are six 2×4 lumbers of 12 feet, a box of 3-inch screws, two paddle holders, and four PFD holders. It would be more convenient to have four caster wheels.
Importantly, buy everbilt that can hook from 20 to 25 lbs to hold gears together with the kayaks.
The most tricky part is to square up four out of six lumbers and drill two screws into each corner. The square frame will be the side secured in another 6-feet lumber.
24. DIY Kayak Storage: ABS Pipe Kayak Rack
Compared to PVC racks, the ABS ones tend to be extra strong and rigid. Excitingly enough, the project is still much more affordable than the lumber.
We recommend building one side of your rack first to create a cradle experience. Then, add more layers accordingly to the left-hand side and the right-handed side. The two bars in the middle sections are available to support the rack.
Building the rack in sections as above makes it easier to fit them together and in equal dimensions.
Project details: sitons.com
25. DIY Outdoor Kayak Storage Rack
This rack is the perfect choice for three boats which are about six or eight feet long. It looks small and light but turns out to have a big storage capacity.
You will need a PVC pipe that is two inches wide and 24 feet long and cut it into pieces in different sizes: 48 inches, 30 inches, 17 inches, 15 inches, 12 inches, 6 inches, and 3 inches.
Once you get all, install them with 2-inch T joints and 90-degree elbow joints.
The base and the top of the rack have the same structure, connected by a vertical pipe and joints. All pieces must fit snugly to ensure balanced and sturdy storage.
Project details: instructables.com
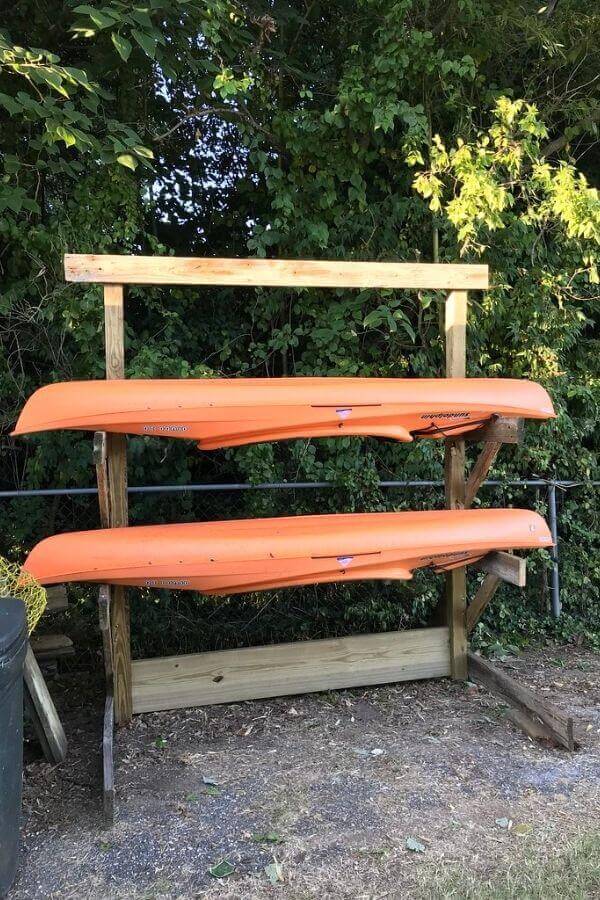
26. Easy DIY Kayak Rack By Alex Barham
Alex Barham shared a project of a wooden free-standing Kayak rack to store twelve kayaks at a time.
The part we like the most about this project is its sturdy base and stability with process pressure treating.
There is a 4×4 lumber in between the base and another two 45-degree 2×4 support pieces to keep the vertical lumber and base screwed well.
27. Kayak Rack Build With Three Shelves
The project features three shelves – each is 36 inches deep, 50 inches long, and 72 inches tall. A 48-inch bottom base will support them. Such a dimension offers convenient storage space for small and medium boats.
The steps are simple. You should screw the mainframe first out of four 2×4 lumbers on the sides and the support pieces in the four corners.
Then, screw the arms on the end pieces with at least five screws on each end to complete the sturdy rack ever.
Project details: imgur.com
28. DIY Kayak Rack For Garage
Besides outside kayak racks, you can also build an easy internal wall-mounting rack to store your boat.
To begin with, screw two boards onto the wall. Secure another board onto the first two ones – about ⅓ in size. Continue with another board placed horizontally on the second board.
Cut 45-degree support boards and screw them between the two shortboards. Finally, screw shortboards outside to keep your kayak from falling out. You’ve completed the project.
29. DIY Kayak Rack Free Plans
You will like the idea of this project – a rack standing against the property line or existing wall and building.
We appreciate that the bases and the holding arms are very sturdy. They consist of two sturdy 2×4 lumbers rather than one. There are also 45-degree support pieces to keep the base and arms in place and handle the weight of boats more effectively.
Link source details: howtospecialist.com
30. How To Build a Kayak Storage Rack By Jim Thomas
This video shared with you a sturdy plan to set up the kayaks. This is a super-durable and extensive rack to hold 6 big boats at a time.
The approach is to build a base of a 4×6 post, which is 12 feet long. Then, put a 45 vertical post halfway up so it will not touch the ground and might get moisturized.
Screw large bolts to secure the two parts in place and install the arms accordingly.
31. Kayak Rack out of PVC
This PVC rack is super light and able to install quickly, making it a convenient rack to move around and have your kayaks well-organized.
You will start with building four corner posts. They are several 4-inch pieces connected with the end cap and T joint on the two ends.
Next, add the 36-inch pieces vertically on the T, starting at the top to form the side pieces.
You might want to glue the pieces with a purple primer and cement to ensure that all pipes get aligned and glued perfectly.
Project details: savvyapron.com
32. Make a PVC Kayak Stand By Rated Red
Let’s explore another PVC standing rack for two kayak boats.
We would suggest the 1 ¼-inch pipes because they are sturdy and easy to install.
The cut list includes two pieces of five feet, two pieces of 24 inches, two pieces of 10 inches, two pieces of five inches, two pieces of eighteen inches, and four pieces of thirty inches.
Also, you will need six T-connectors, two elbow, and four caps. Put all parts together using the exterior solid glue and spray paint it.
33. Easy DIY Kayak Stand
We can be creative when it comes to Kayak pipes plans. Take this Kayak Stand, for example – Instead of building in the typical table shape, the rack features two cradles with vertical support pieces in the center.
Related to materials, cut the pipes to sizes and prepare several 90-degree elbows to joint pipes together. You can also use 45-degree elbows to offer more maneuverability for the Kayak.
Continue with installing parts together from the two 24-inch candles on two sides. Each 12-inch piece gets attached to another 12-inch piece, thanks to elbow joints.
Project details: bdharva.com
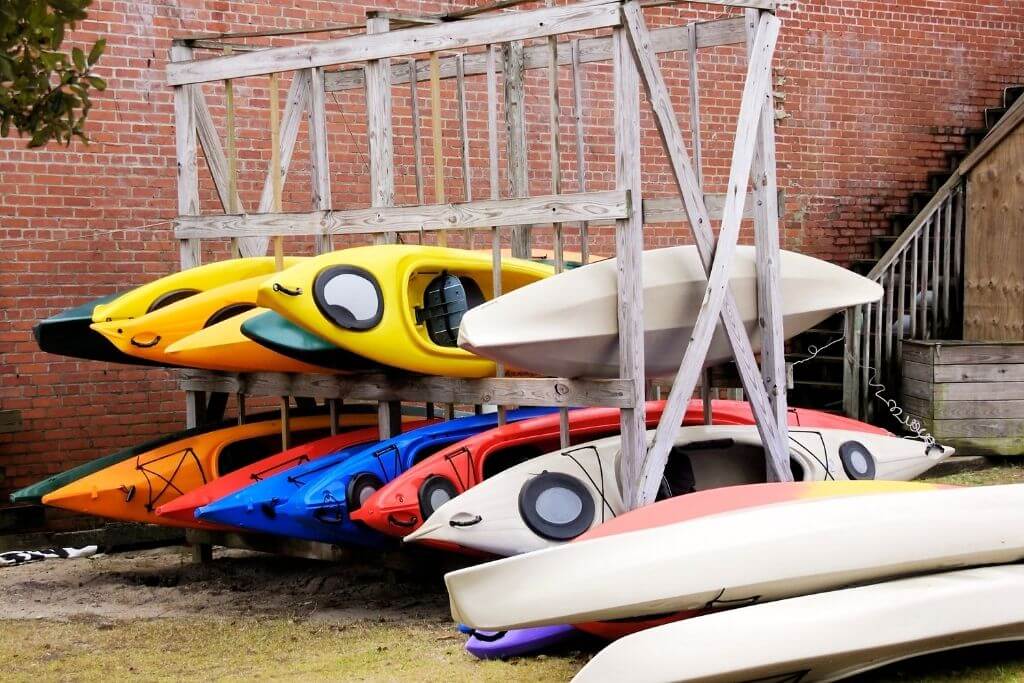
34. DIY Wood Kayak Rack Storage With 8 Kayaks
The project has holding arms on both ends of the posts, meaning that you will find it easy to haul multiple Kayaks at a time. The balance is critical when it comes to such heavy-duty posts and arms.
Thus, the bottoms feature a complicated construction; each gets installed into a sidebar and two other supporting pieces.
More importantly, cut a crossbar to go from the top corner to the other corner. This bar will maintain the distance between posts and keep the whole rack stable.
Project details: jacksonadventures.com
Conclusion
Building a DIY Kayak rack turns out to be not very difficult.
Basically, there are two main types of racks available: the PVC and the wooden ones according to your budget and woodworking experience.
Whatever you choose, you can always find helpful instructions from these lists.
We hope you will like it and start building a kayak rack to fit your need.


